TABLE OF CONTENTS
- STEP 1: Navigate to the Library module, and Vehicle sub-module.
- STEP 2: Click the 'Add' button and select Tyre
- STEP 3: Assign approved tyre sizes.
- STEP 4: Assign approved rim sizes.
STEP 1: Navigate to the Library module, and Vehicle sub-module.

STEP 2: Click the 'Add' button.
To add a vehicle, click the add button.

The 'Add vehicle specification' dialogue will open. The following fields are mandatory:
- Model
- Manufacturer
- Postions
- Axles
- Position layout
Odometer and Mounting type are not mandatory, however they will have a default setting applied, change this if required. Click 'Next' to continue.

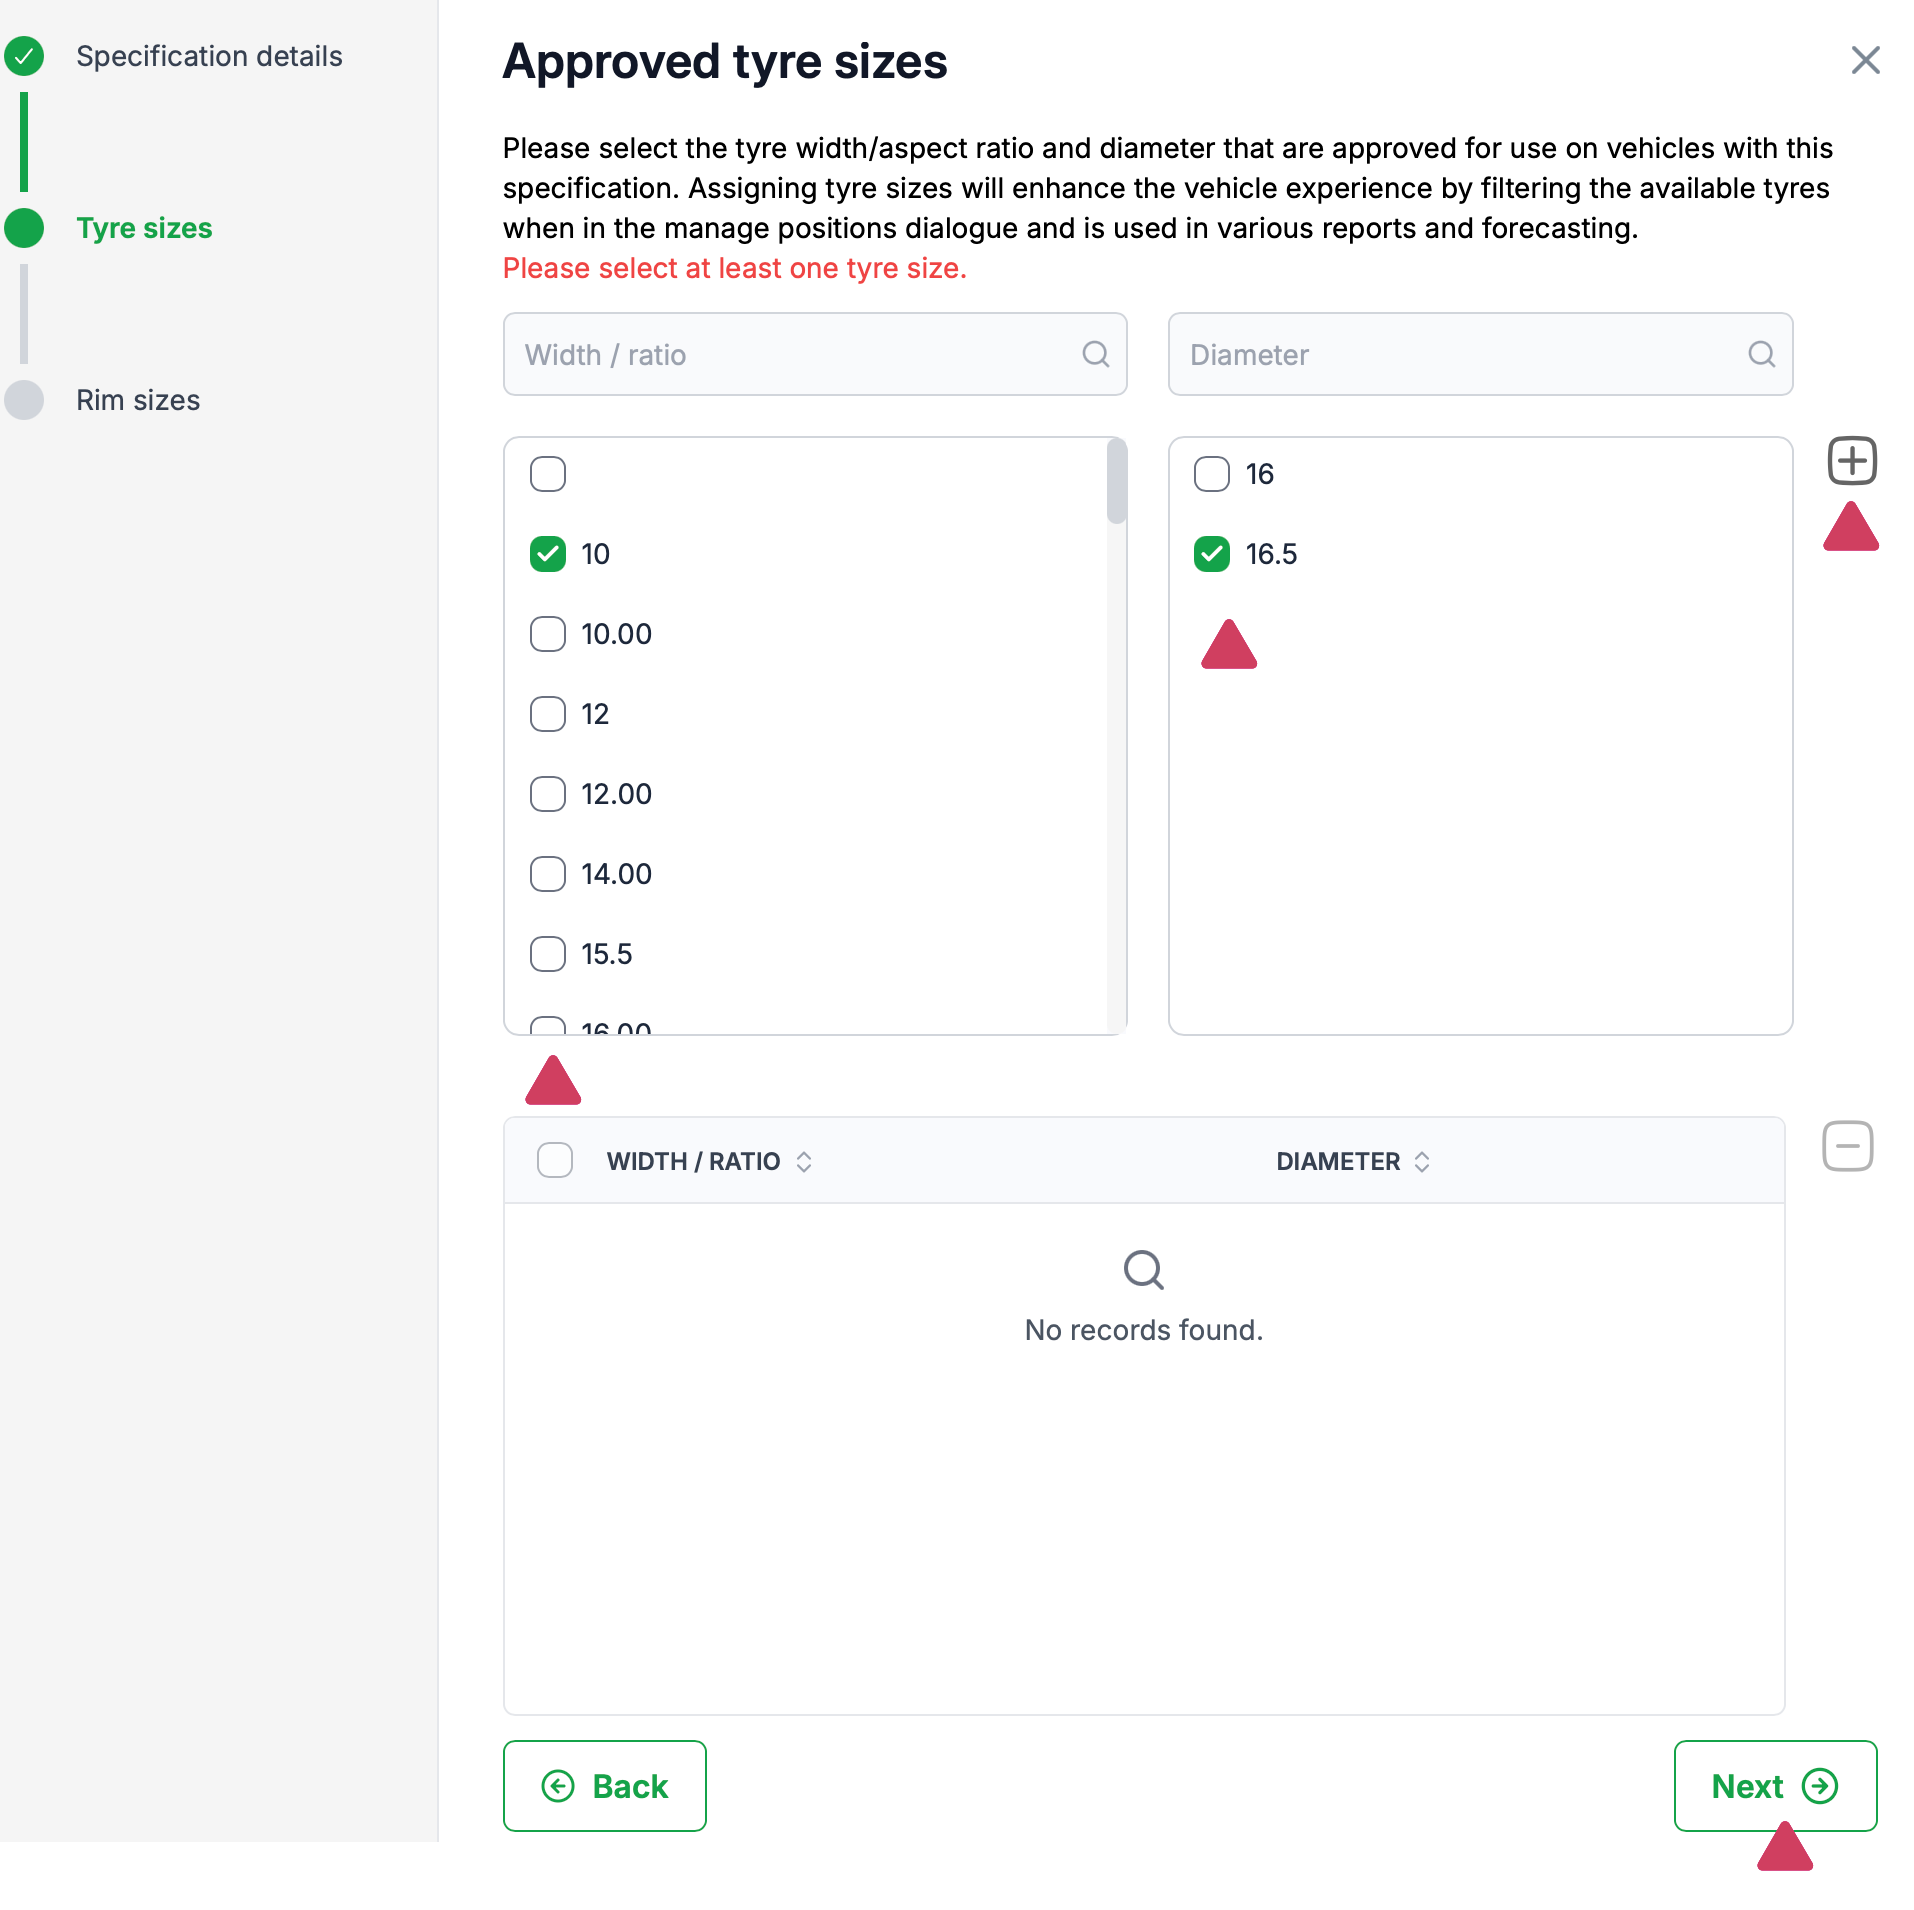
STEP 3: Assign approved tyre sizes.
Approved tyre sizes one entry is mandatory. First select a 'Width / Ratio', the the 'Diameter' list will then be populated. Select an appropriate 'Diameter' and press the 'Add' button.
Approved tyre sizes help filter what tyres will be available when assigning tyres to a vehicle position. Don't worry if you haven't added all the sizes approved for the vehicle type, a domain administrator will review and make any necessary changes for you.
Press 'Next' to continue.
STEP 4: Assign approved rim sizes.
Approved rim sizes one entry is mandatory. First select a 'Diameter', the 'Width' list will then be populated. Select an appropriate 'Width' and press the 'Add' button. .
Approved rim sizes help filter what rims will be available when assigning rims to a vehicle position. Don't worry if you haven't added all the sizes approved for the vehicle type, a domain administrator will review and make any necessary changes for you.
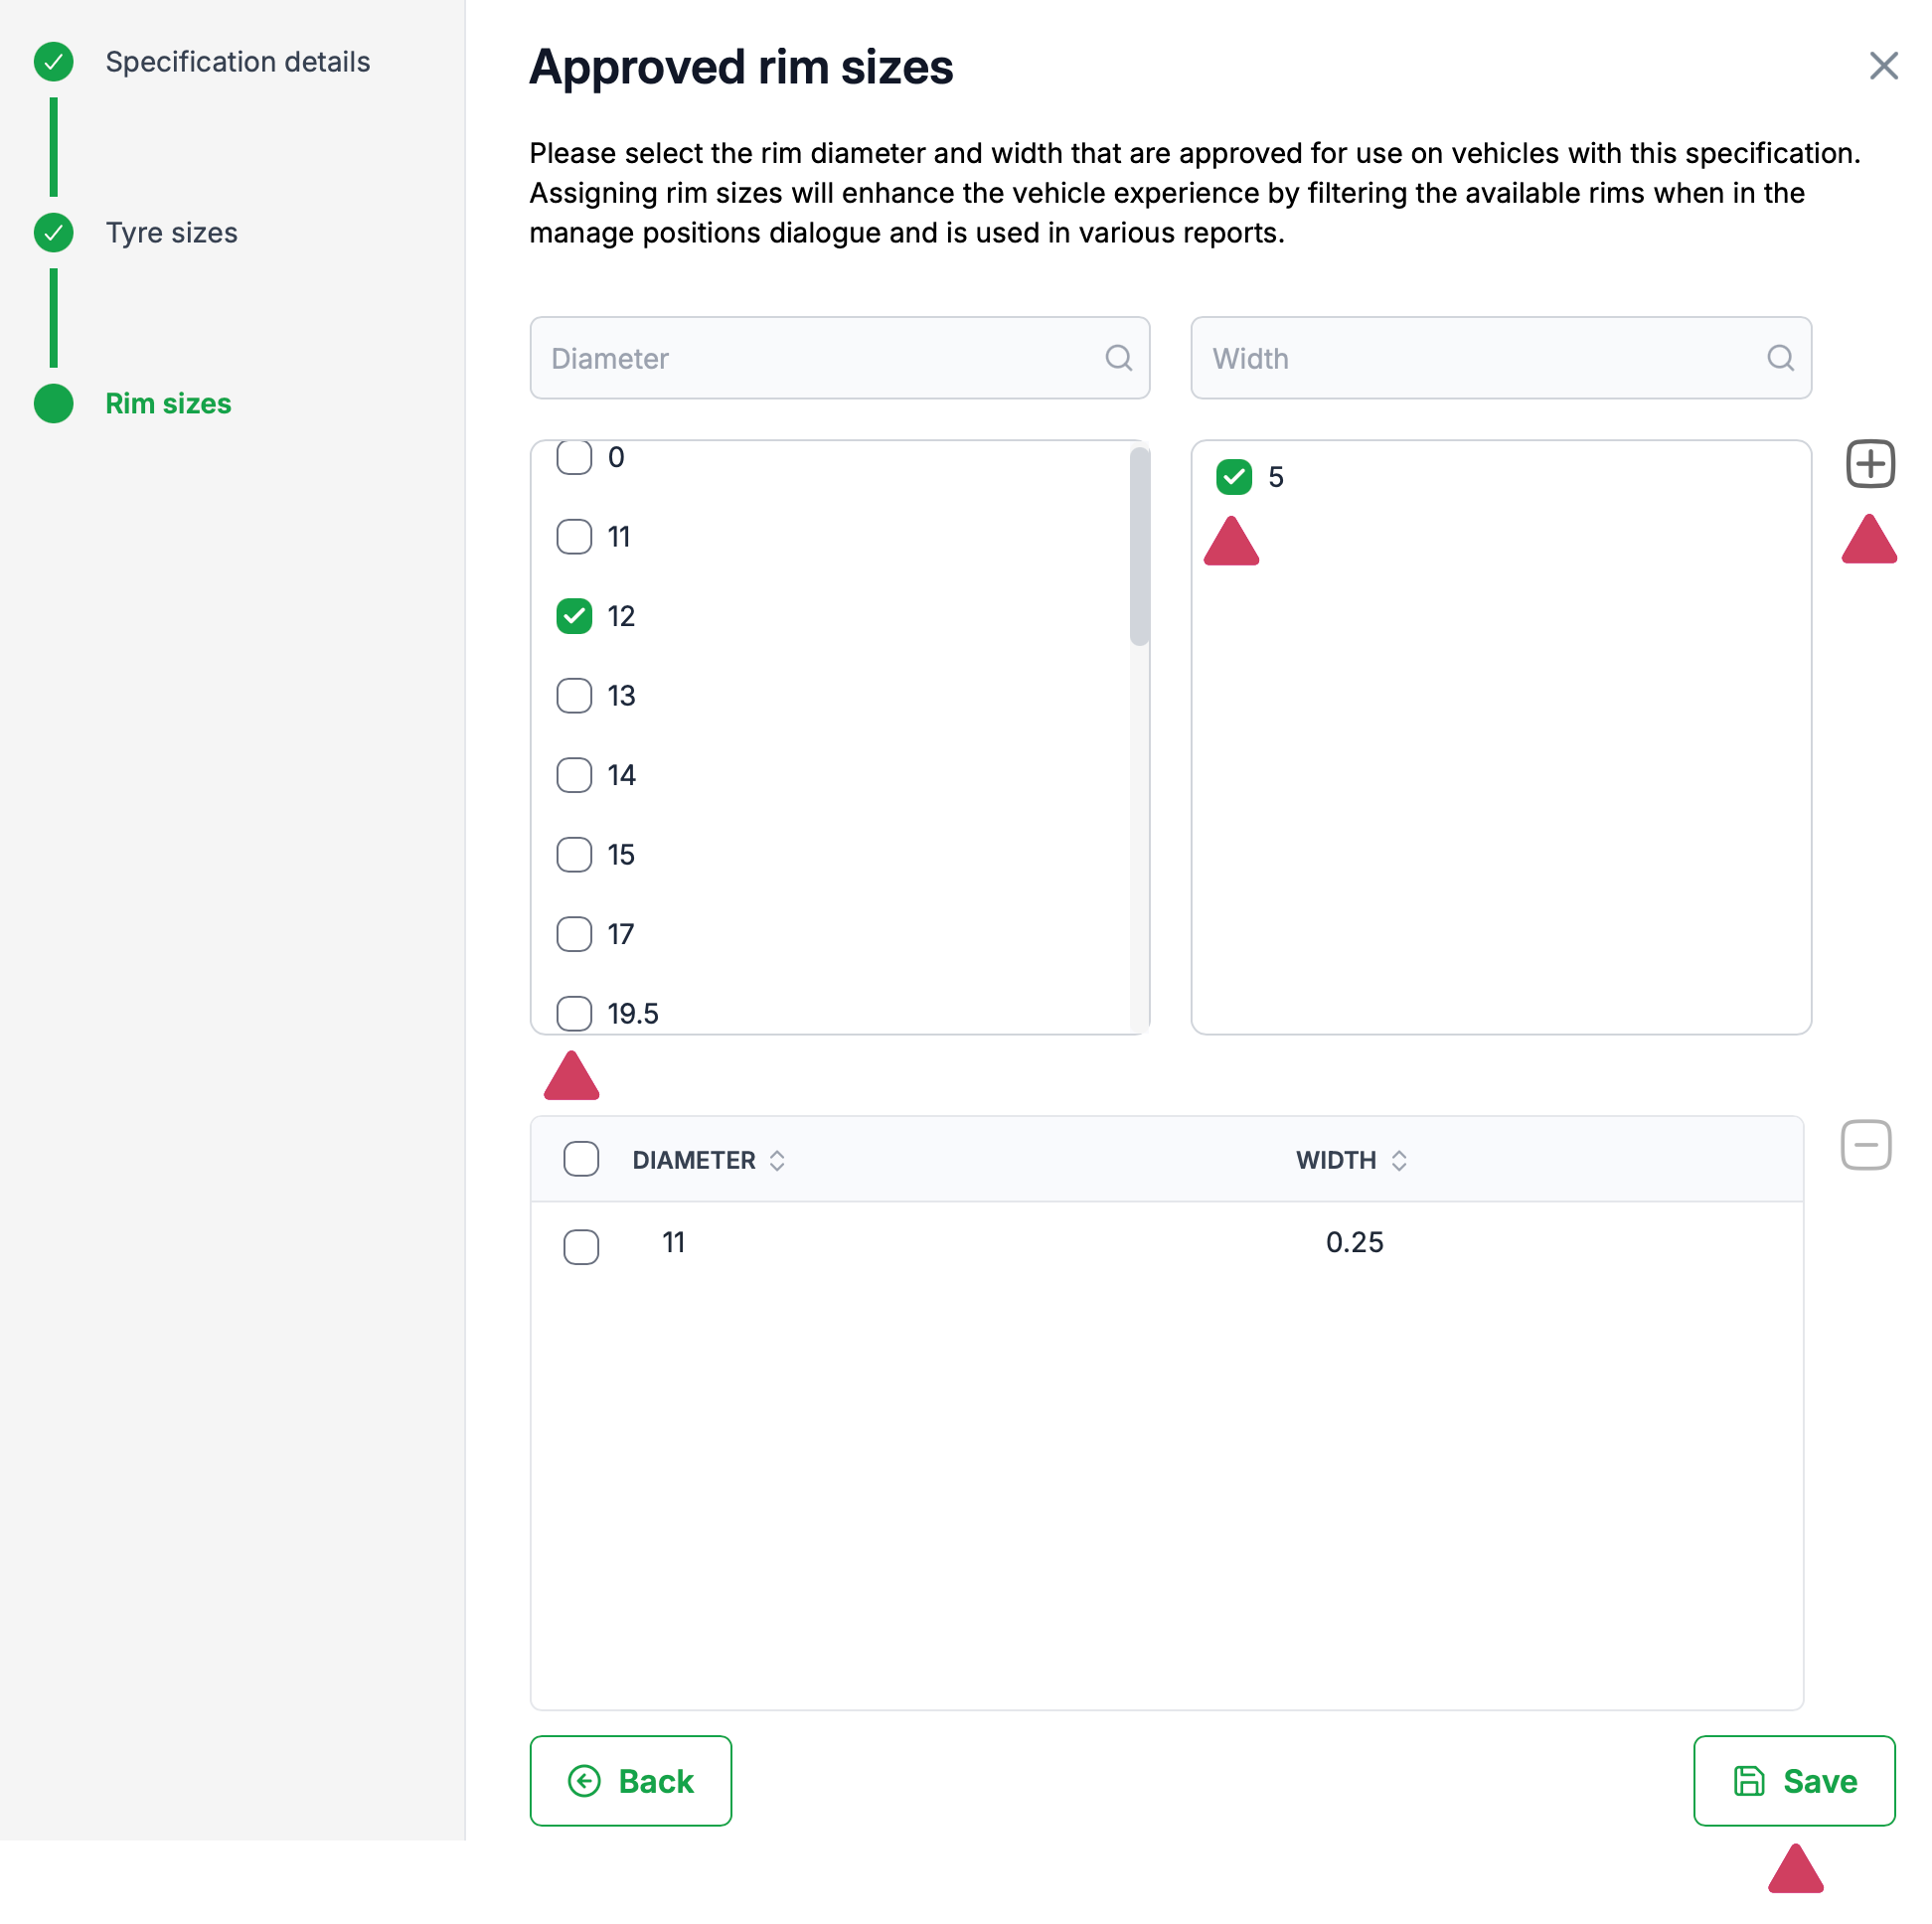
Press 'Save' to finalise and save your temporary specification.
Your newly saved specification will now be displayed as a temporary specification. You can now assign this temporary specification to a vehicle asset.

Was this article helpful?
That’s Great!
Thank you for your feedback
Sorry! We couldn't be helpful
Thank you for your feedback
Feedback sent
We appreciate your effort and will try to fix the article