When creating then assigning rims in TMaSS, a newly created rim asset may sometimes not appear in the Manage Positions dialogue for a vehicle.
In most cases, this happens because the vehicle specification does not have that rim size approved.
TABLE OF CONTENTS
- What causes the issue?
- Why this happens
- Recommended solution
- Best practice when creating rim assets
- If the issue already exists
- Summary
What causes the issue?
Each vehicle specification defines the approved fitments for that vehicle, including:
- approved tyre sizes
- approved rim sizes
As shown in Image 1 below, the vehicle specification contains an Approved rim sizes section. If the rim size of the new rim asset is not listed there, TMaSS will not make that rim available for selection when assigning rims to positions through Manage Positions.
This means that even though:
- the rim specification exists, and
- the rim asset has been created,
The system may still prevent it from being used on that vehicle because the vehicle specification does not recognise it as an approved fitment.
Image 1

Why this happens
Users can create their own rim specifications in the Library. However, creating a rim specification alone does not make it valid for a vehicle.
If the related vehicle specification has not been configured to allow that rim size, the rim will not be available when managing fitted positions on the vehicle.
This is particularly prevalent when using the 'Generic Wheel' specification as no vehicles has this specification approved.
Recommended solution
To reduce the chance of this issue, it is recommended that when creating a rim asset, the user also assigns an Approved vehicle fitment.
As shown in Image 2 below, the Approved vehicle fitment step allows the user to nominate which vehicle specifications are approved to use that rim specification.
Image 2

When using the 'Add Multiple assets' function to create rims, the Approved vehicle fitment step is associated with the serial number, as shown in image 3 below. Pressing the '+' icon, the 'Approved fitments' dialogue is displayed (image 4) allowing the user to nominate which vehicle specifications are approved to use that rim specification.
Image 3
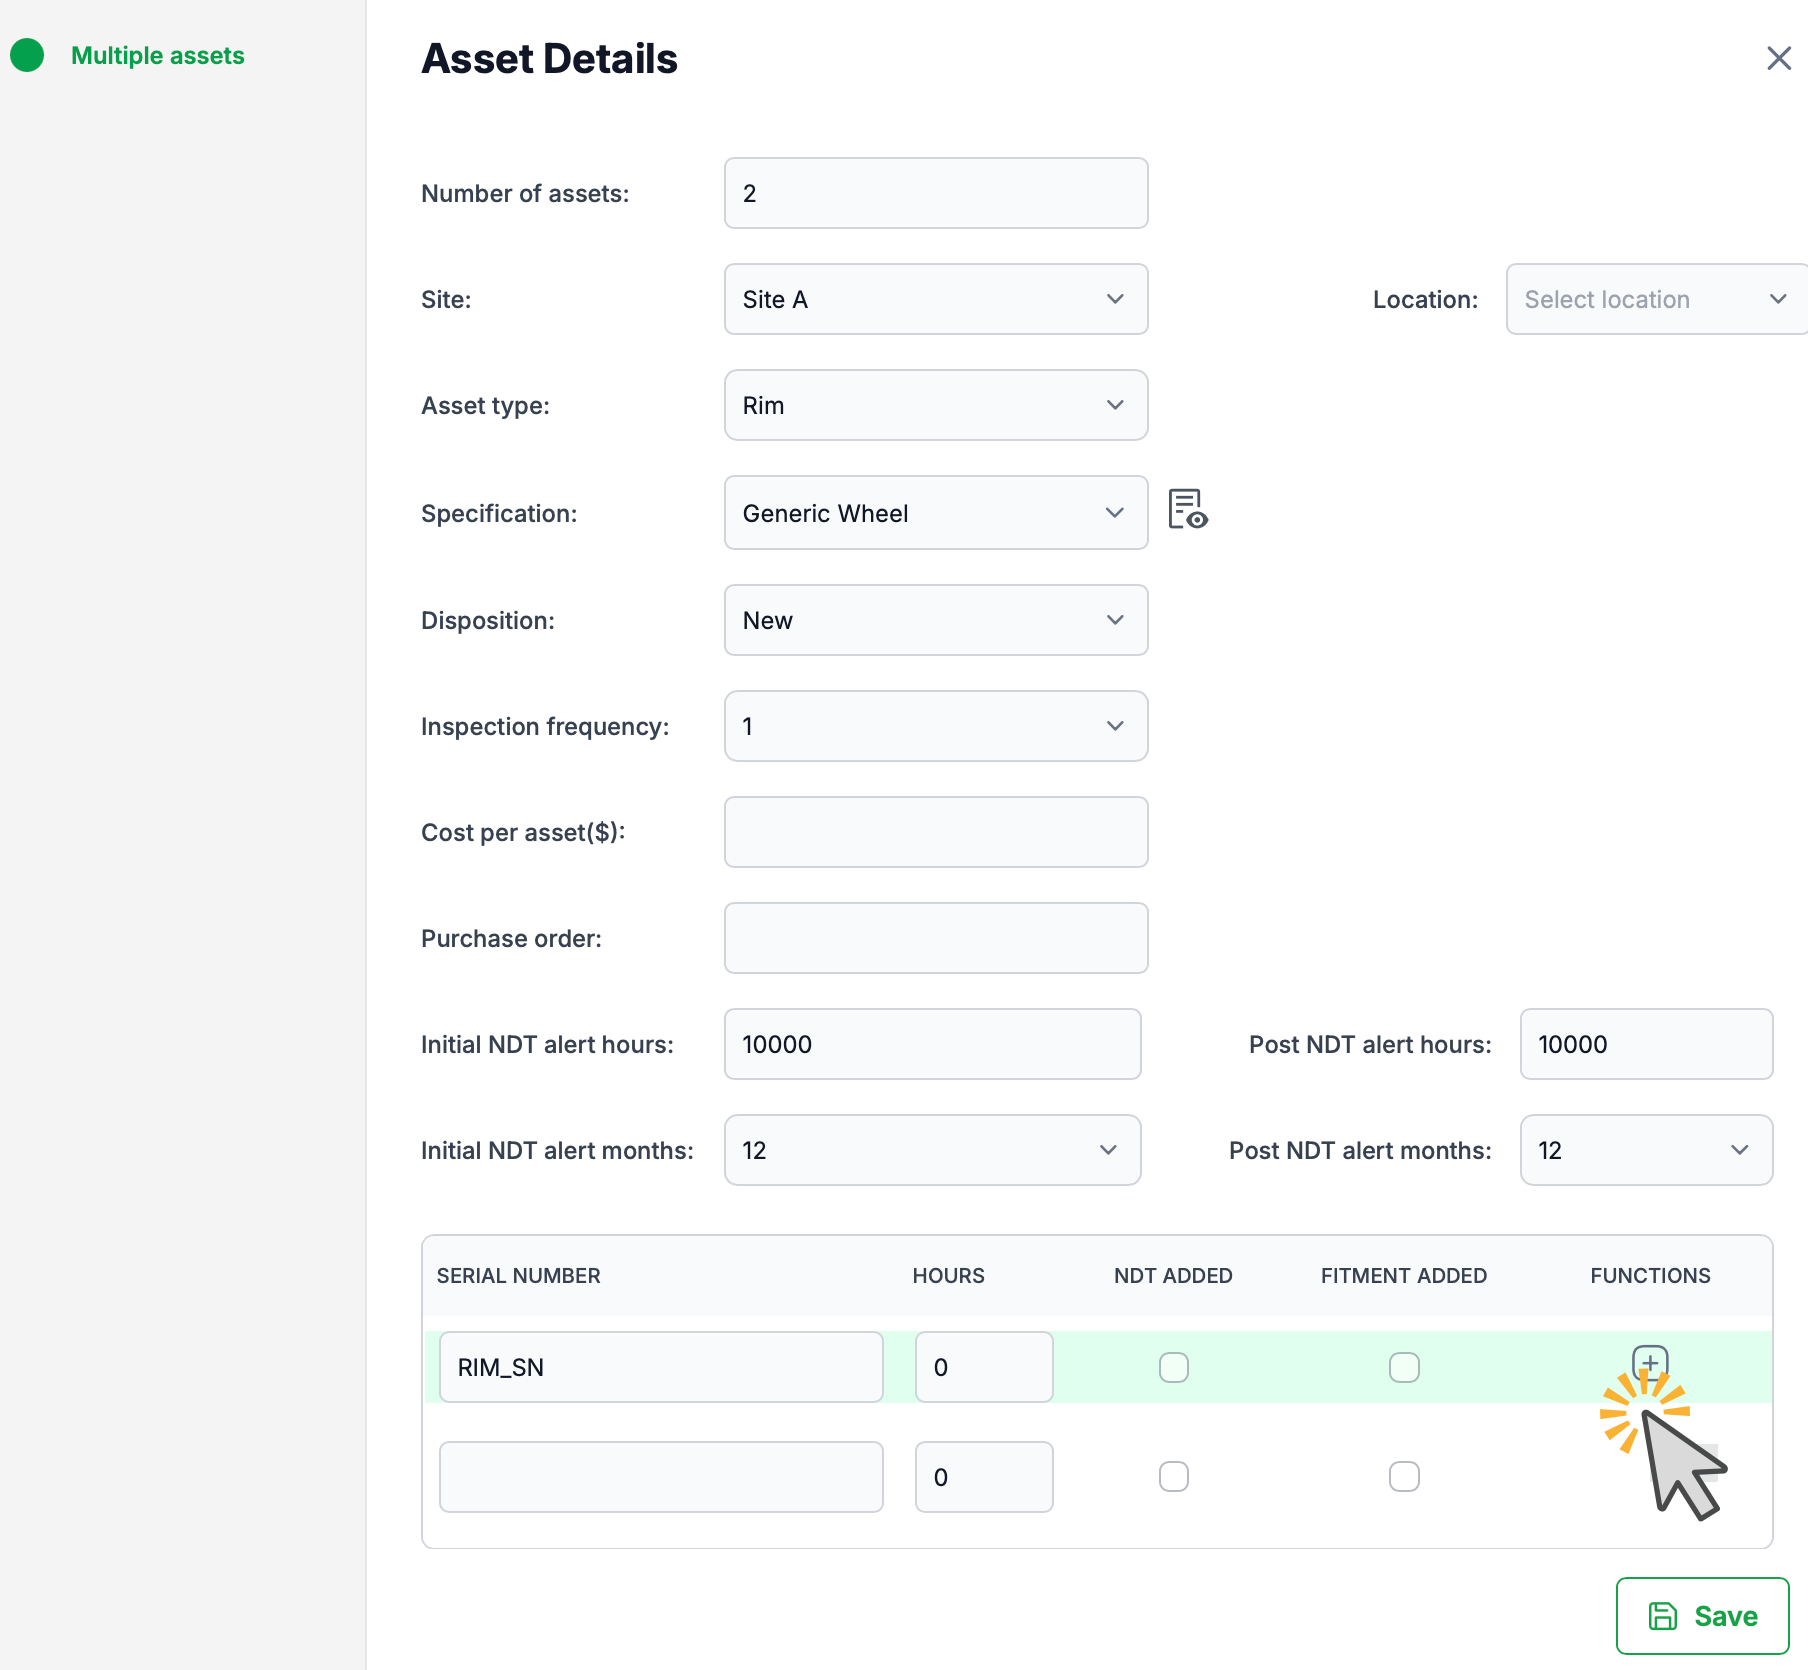
Image 4

If a vehicle specification is assigned at this stage, the rim becomes available for that vehicle when using the Manage Positions function.
Best practice when creating rim assets
When adding a new rim asset:
- Create the rim asset as normal.
- On step 2 of the rim creation wizard, select the relevant vehicle specification(s) that are approved to use that rim.
- Save the save the asset.
When adding a multiple new rim assets:
- Create multiple rim assets as normal.
- At the bottom of the creation dialogue, for each rim add an approved vehicle specification(s) by clicking on the '+' button and selecting the required vehicle specification.
- Save the save the asset.
Doing this ensures the rim can be recognised as a valid fitment for those vehicles and avoids issues later when assigning rims to positions.
If the issue already exists
If a rim has already been created but is not appearing in Manage Positions:
- Check the vehicle specification being used by the vehicle.
- Review whether the rim’s size is included in the vehicle’s Approved rim sizes.
- If it is not, log a support request and request the rim specification be added to the vehicles approved rim fitments.
Once the correct fitment relationship is in place, the rim should become available for use in Manage Positions.
Summary
A rim asset usually does not appear in Manage Positions because:
- the rim size is not approved on the vehicle specification, or
- the rim specification has not been linked to the correct Approved vehicle fitment.
To avoid this, always assign the appropriate Approved vehicle fitment when creating a rim specification. This ensures the rim is available for the correct vehicles during position management
Was this article helpful?
That’s Great!
Thank you for your feedback
Sorry! We couldn't be helpful
Thank you for your feedback
Feedback sent
We appreciate your effort and will try to fix the article