This article explains how to quickly update the hour meters for multiple vehicles in a fleet using a single dialogue in the Fleets sub-module.
Overview
Using the Fleet hours update dialogue, you can:
Update the recorded hours for every vehicle in a fleet from one screen
Adjust the job date (for back-dating or future-dating entries)
Step through each vehicle in turn, entering the new hour reading, then move to the next vehicle
This improves accuracy and saves time compared with updating each vehicle individually.
1. Open the Fleet Hours Update Screen
From the main navigation, select Fleets.
Locate the fleet you wish to update (for example, Haul).
On the right-hand side of the fleet row, click the Fleet hours icon (see Image 1 – Fleets list).
This opens the Fleet hour details screen for that fleet.
Image 1 – Fleets list

2. Set the Job Date (Optional)
On the Fleet hour details screen (Image 2 – Fleet hours update):
Review the Job date field at the top of the screen.
If you need to back-date or future-date the update:
Click the calendar icon.
Select the required date.
The chosen date will be applied to all hour updates made in this session.
3. Select the Vehicle to Update
In the Select vehicle panel, you will see a list of all vehicles assigned to the fleet.
Click the checkbox next to the vehicle you want to update (e.g. LD-001).
Once selected, the Vehicle asset number and Current hours are displayed below the list.
Image 2 – Fleet hours update
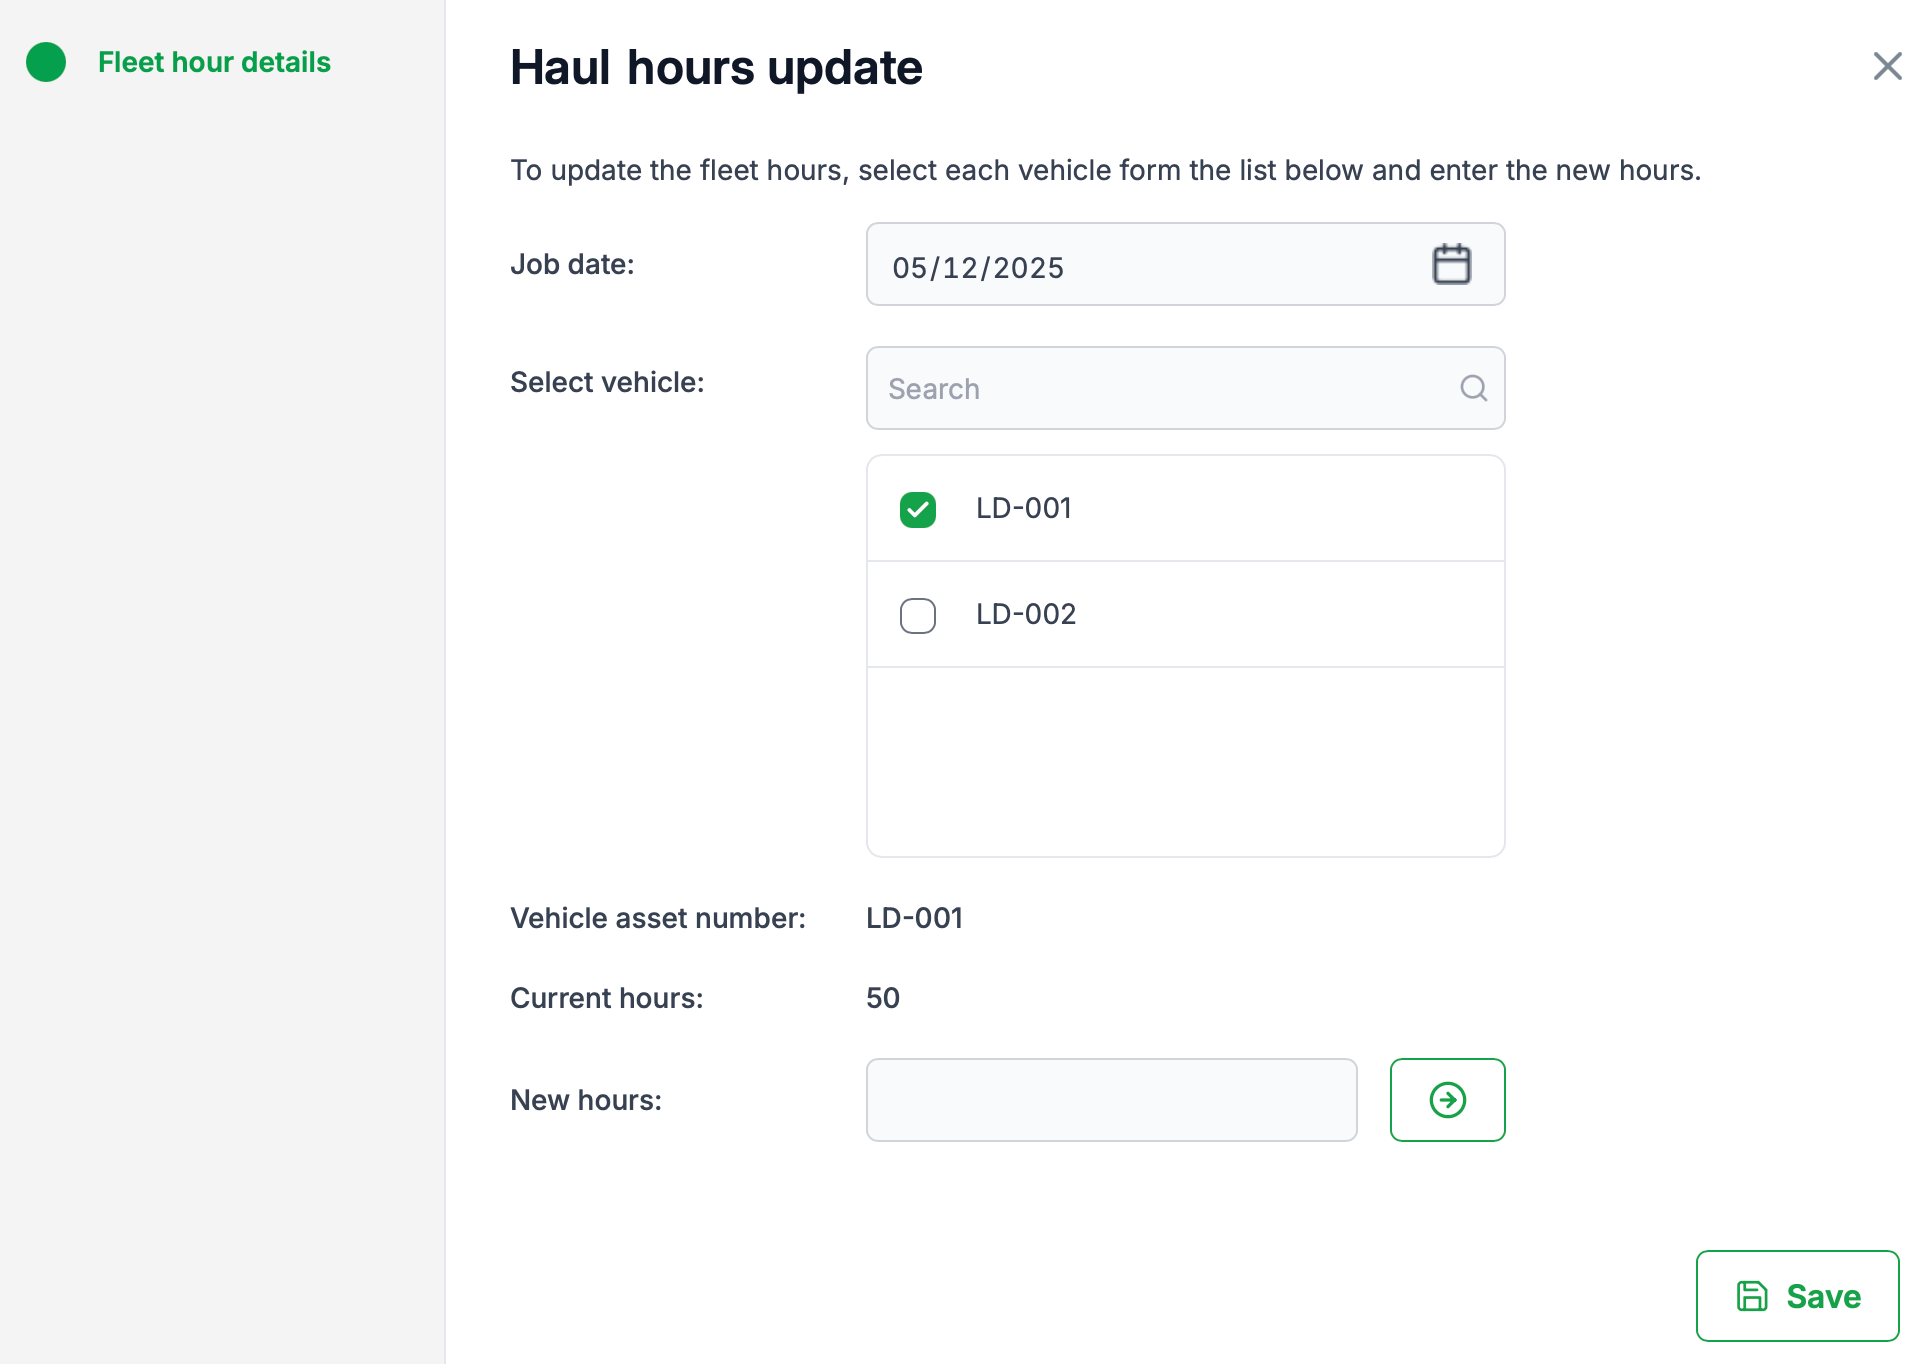
4. Enter the New Hour Reading
In the New hours field, type the updated hour meter reading for the selected vehicle.
Click the Next button (circular arrow icon) beside the field.
This saves the new hours for the current vehicle within the dialogue and automatically moves focus to the next vehicle in the list.
Repeat this process (select vehicle → enter New hours → click Next) until you have updated all required vehicles in the fleet.
5. Save and Exit
After you have updated the hours for all vehicles, click Save in the bottom-right corner of the screen.
The system will:
Save the hour updates for all vehicles processed in this session.
Close the Fleet hour details screen and return you to the Fleets list.
Tips & Notes
Bulk workflow: You don’t need to leave the dialogue for each vehicle. Use the Next button to cycle through the entire fleet from the one screen.
Data accuracy: Ensure the Job date and New hours values reflect the actual meter reading at that date and time.
Partially completed updates: If you exit without clicking Save, any hour updates entered in this session will be recorded.
By following these steps, users can efficiently maintain accurate hour meters for all vehicles in a fleet from a single, streamlined interface.
Was this article helpful?
That’s Great!
Thank you for your feedback
Sorry! We couldn't be helpful
Thank you for your feedback
Feedback sent
We appreciate your effort and will try to fix the article