A Fleet is a grouping of vehicles managed together with shared utilisation, inspection, and maintenance rules. Fleets allow for easier scheduling and tracking, but note that a vehicle can only belong to one fleet at a time.
Steps to Add a Fleet
1. Navigate to the Fleet Sub-Module
From the main menu, go to Fleets.
Click the Add button to open the Create Fleet form.

2. Complete the Fleet Details Form
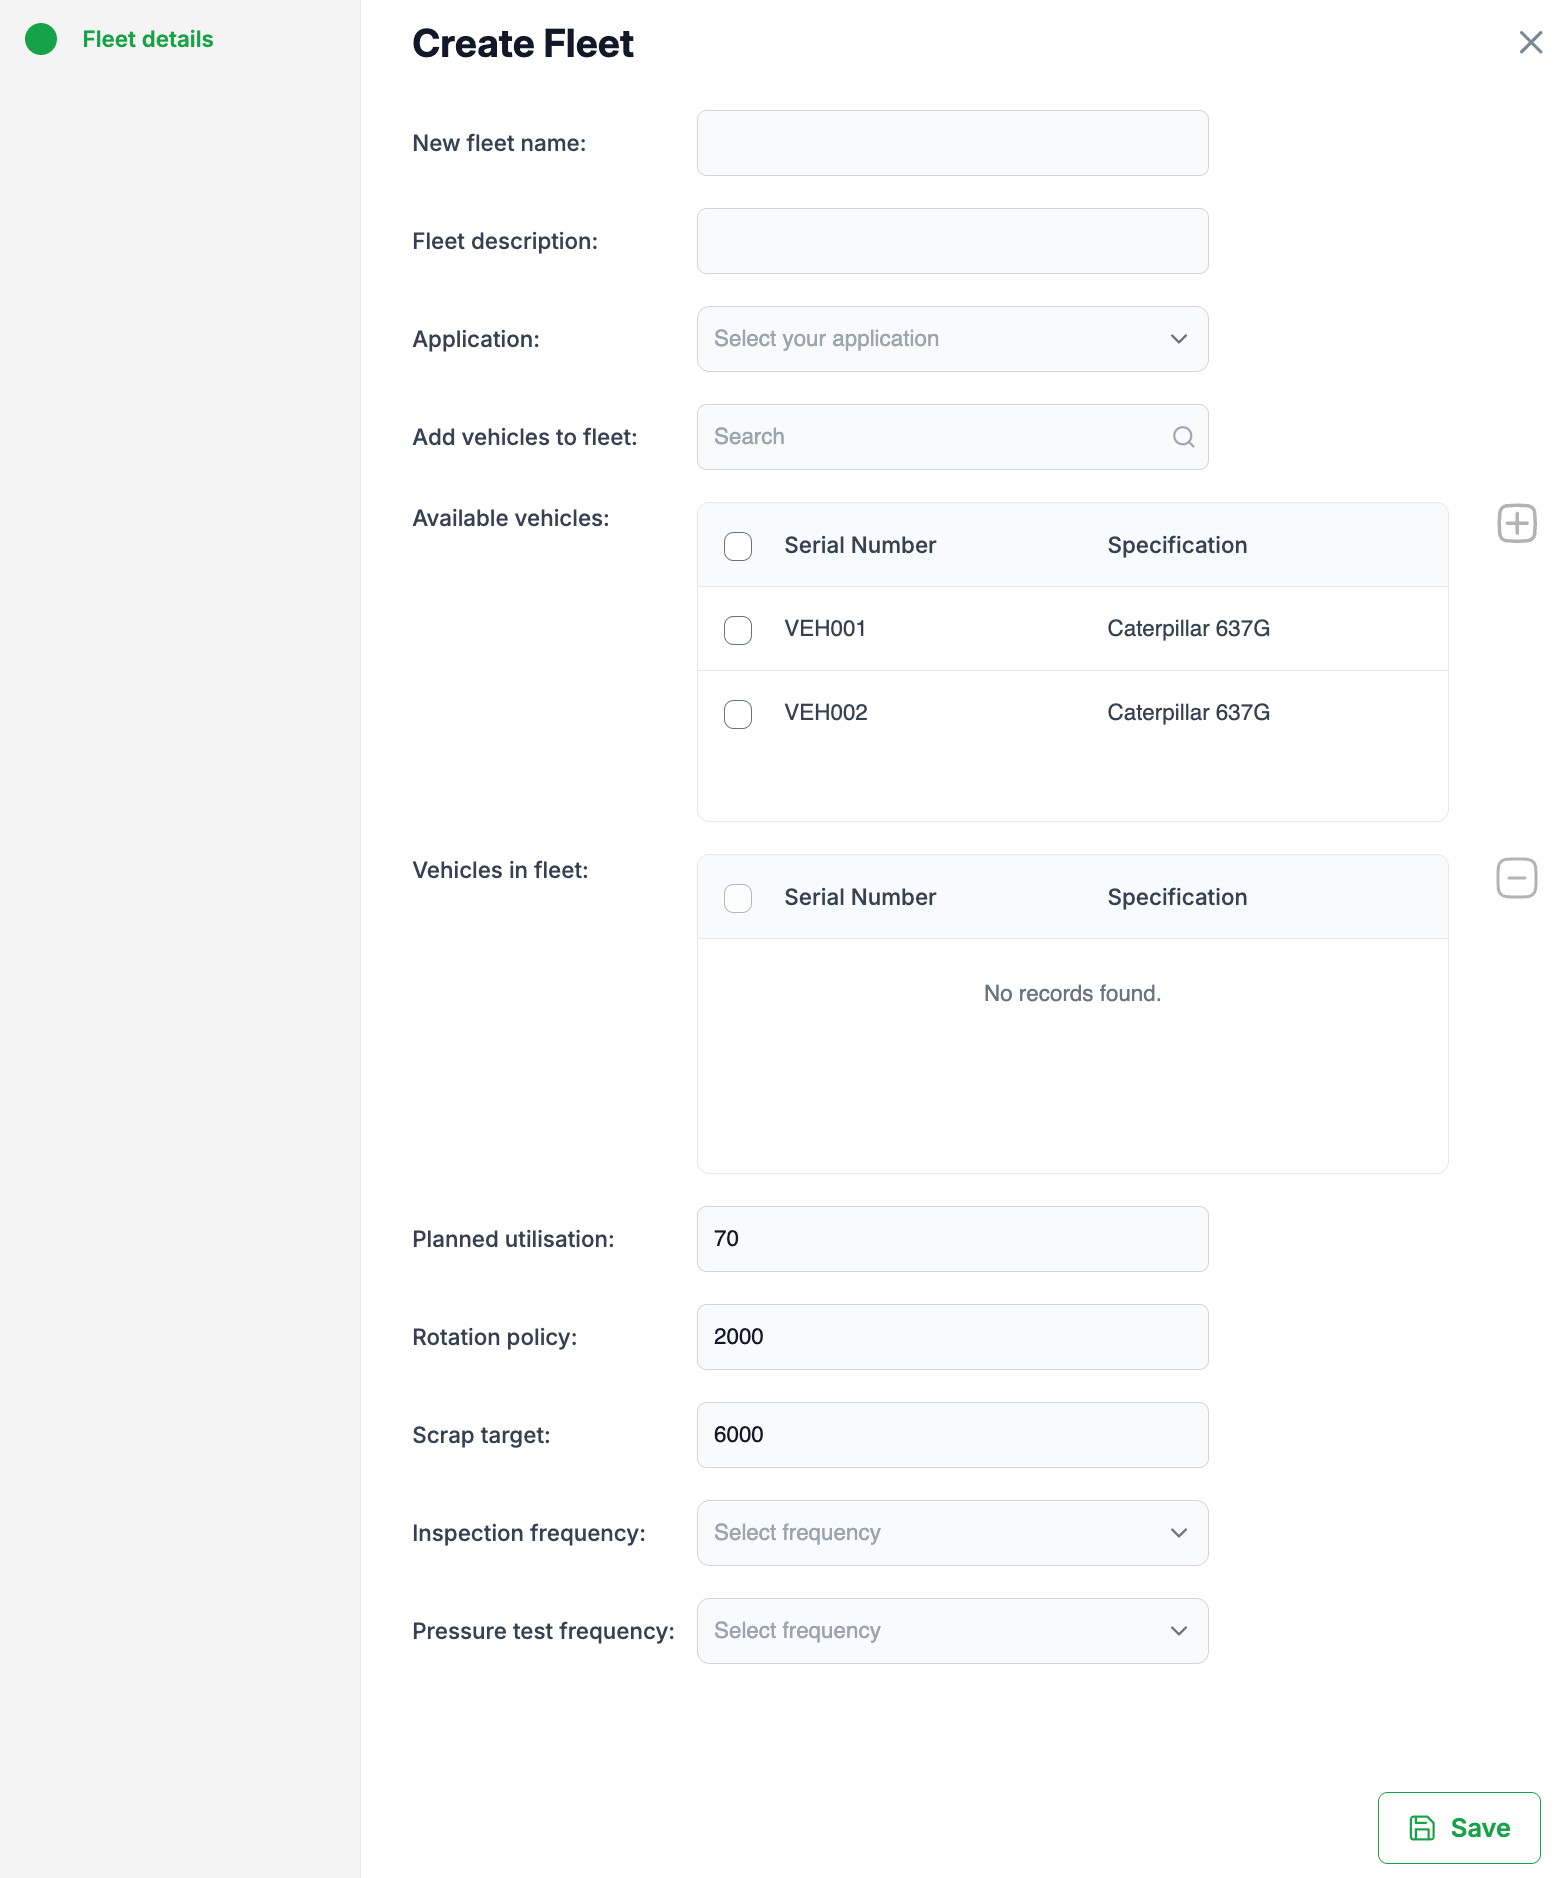
In the Create Fleet screen (see image below), you can specify the following:
Fleet name – A unique identifier for the fleet.
Fleet description – Additional notes or details about the fleet.
Application – Select the application or operational use case for this fleet.
3. Add Vehicles
Select one or more vehicles from the Available vehicles list.
Click the plus (+) icon to add them to the fleet.
Remember: a vehicle can only be part of one fleet at a time.
4. Set Fleet Parameters
Fleet-level settings override individual vehicle settings. You can define:
Planned utilisation (%) – Target utilisation rate.
Rotation policy (hours) – Hours before vehicle tyres are rotated.
Scrap target (hours) – Target tyre hours before the tyres are scrapped.
Inspection frequency – How often vehicle inspections should occur.
Pressure test frequency – How often tyre pressure tests are scheduled.
5. Save the Fleet
Once all required fields are complete, click Save.
The fleet will now be created and visible in your Fleets list.
Fleet Management Functions
Once a fleet is created and vehicles are assigned, you can carry out the following directly on the fleet:
Pressure tests
Tread depths
Vehicle inspections
Update the fleet’s hour meter
Edit fleet
Delete fleet
✅ Tip: Use fleets to simplify maintenance schedules across similar vehicles and ensure consistent application of utilisation and rotation policies.
Was this article helpful?
That’s Great!
Thank you for your feedback
Sorry! We couldn't be helpful
Thank you for your feedback
Feedback sent
We appreciate your effort and will try to fix the article