The Inspections tab in TMaSS Mobile provides a single place to view and manage all tyre and vehicle inspections stored on your device.
TABLE OF CONTENTS
- 1. Where inspections come from
- 2. What you see in the Inspections list
- 3. Retention policy & unsynchronised inspections
- 4. Filtering inspections (Image 2)
- 5. Adding inspections from the Inspections tab (Image 3)
1. Where inspections come from
Inspections can be created in two ways:
Managed tyres
Go to the Assets tab.
Tap the required tyre asset.
Tap the Add (+) button to create a new inspection for that managed tyre.
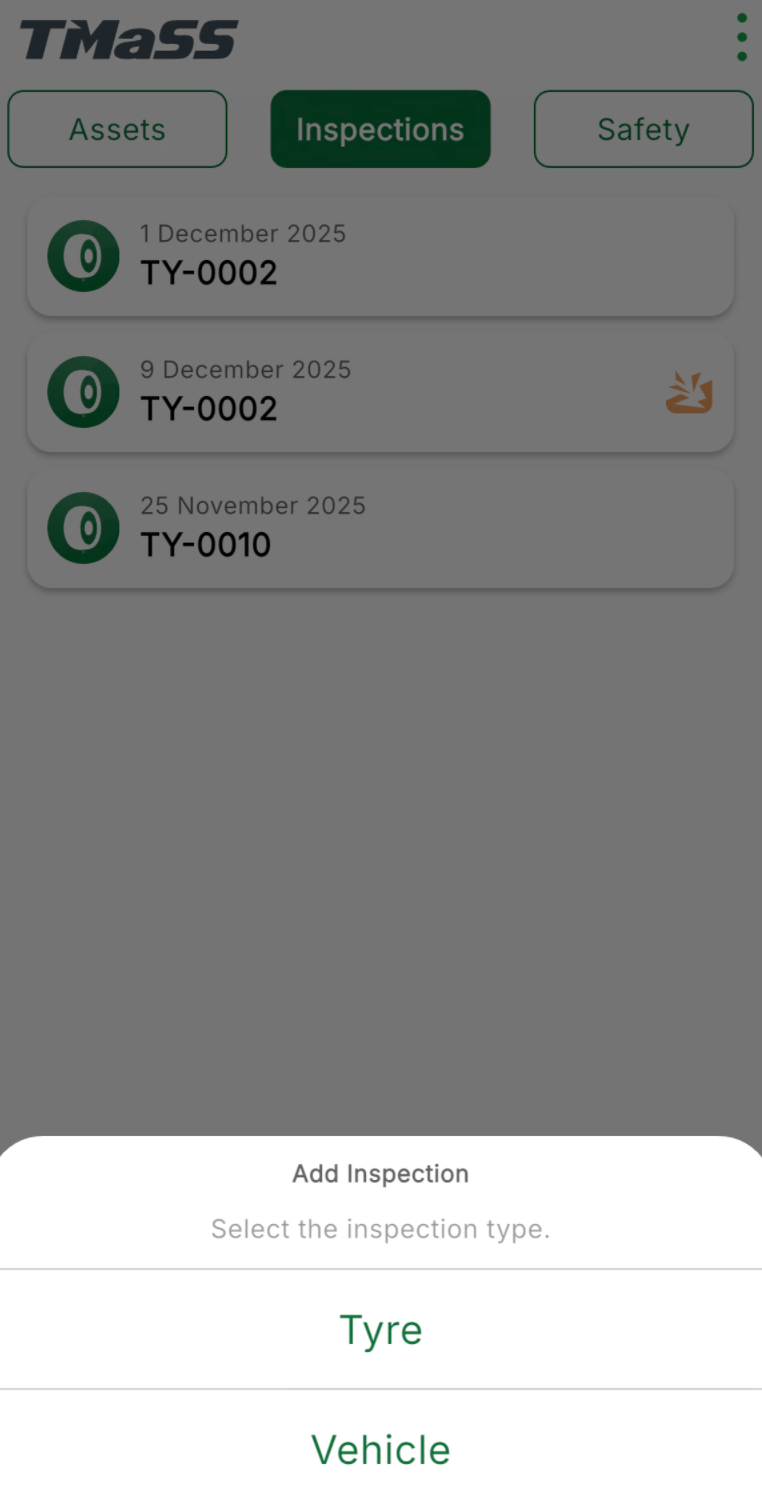
Un-managed tyres or vehicles (see Image 3)
From either the Assets or Inspections tab, tap the Add (+) button in the bottom bar.
Choose Tyre or Vehicle to start an inspection that isn’t linked to a managed tyre asset.
Once an inspection is saved, it appears in the Inspections tab (see Image 1).
Image 1 – Inspections list
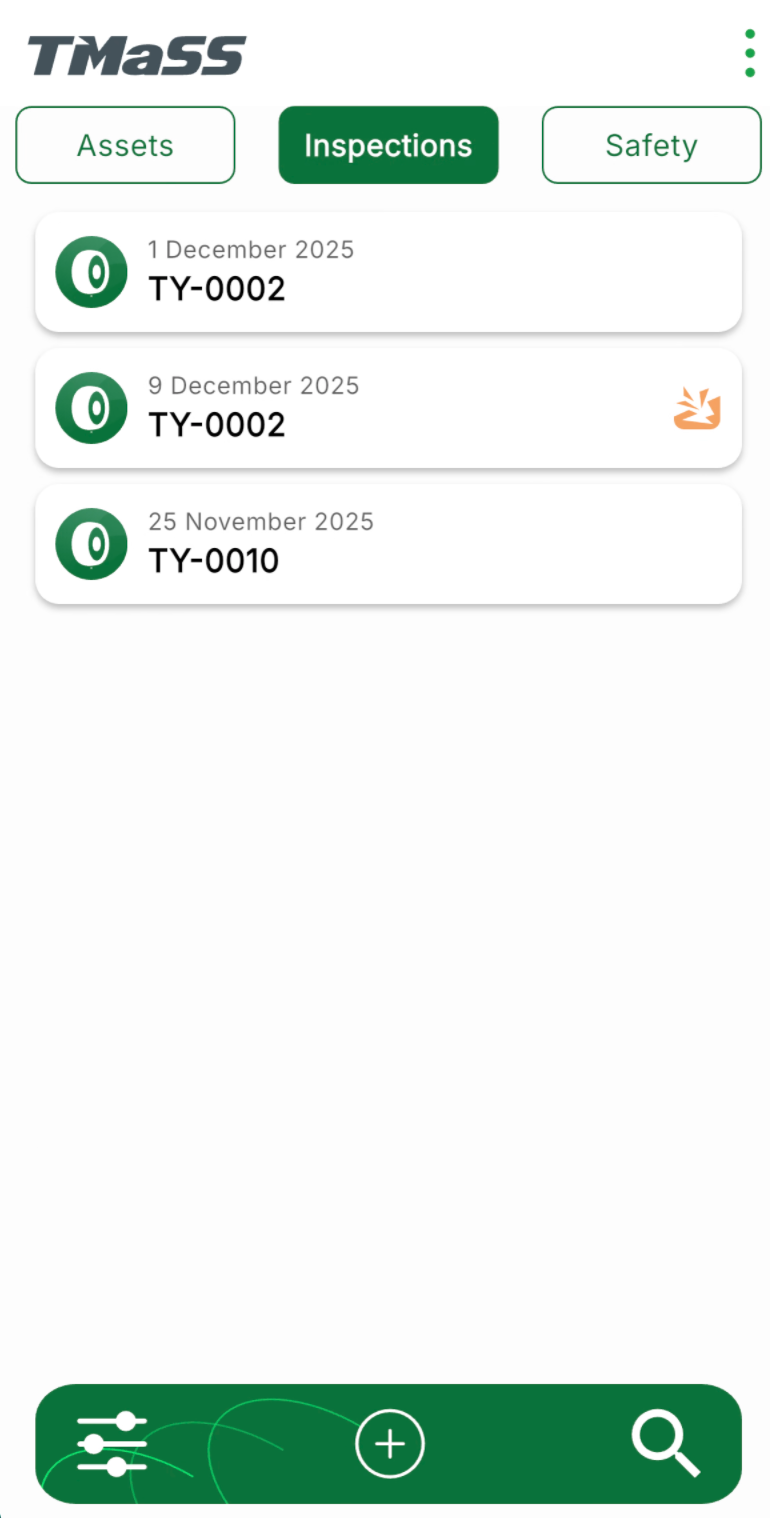
2. What you see in the Inspections list
Each inspection card in the list shows:
Inspection date
Asset number the inspection was completed on (e.g.
TY-0002)Damage indicator – an orange damage icon is shown when damage was recorded during that inspection, allowing quick identification of inspections requiring follow-up.
Unsynchronised inspections are also shown here.
3. Retention policy & unsynchronised inspections
The inspections displayed on this tab are controlled by:
The application data retention policy configured in Settings (e.g. keep inspections for a set number of days/weeks).
Sync status:
Unsynchronised inspections remain on the device regardless of the retention policy until they are successfully synchronised.
Once synchronised, inspections may be removed from the device when they fall outside the configured retention window, but they remain stored in the main TMaSS system.
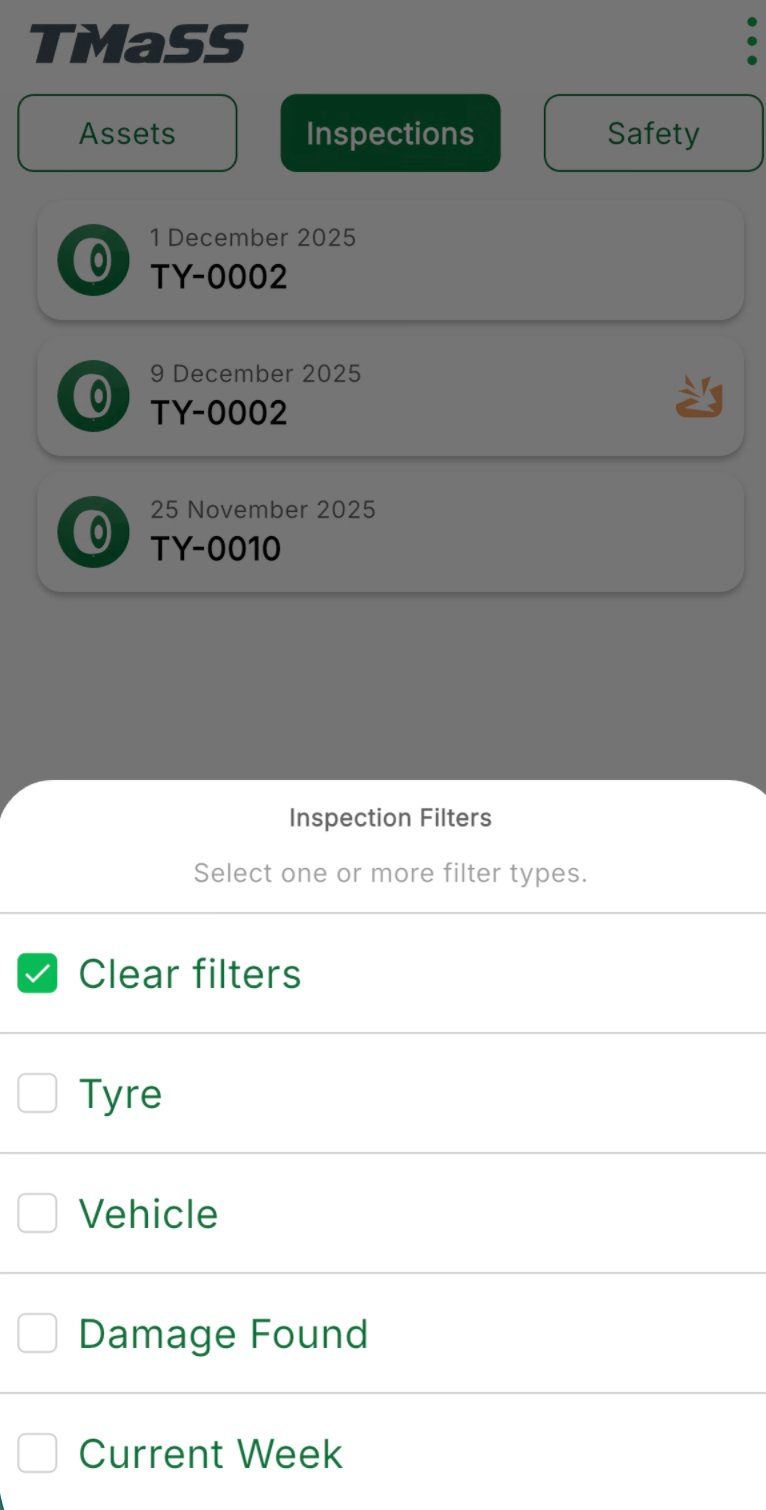
4. Filtering inspections (Image 2)
To refine the list:
Tap the Filter button (sliders icon) on the bottom bar.
The Inspection Filters drawer opens (see Image 2).
Select one or more filters:
Tyre – show only tyre inspections.
Vehicle – show only vehicle inspections.
Damage Found – show only inspections where at least one damage record exists.
Current Week – show only inspections completed in the current week.
Tap Clear filters to remove all filters and return to the full list.
Image 2 – Inspection filters
5. Adding inspections from the Inspections tab (Image 3)
You can also start new inspections directly from the Inspections tab:
Tap the Add (+) button in the bottom bar.
The Add Inspection menu appears (see Image 3).
Choose Tyre or Vehicle to begin a new inspection workflow.
Image 3 – Add Inspection (Tyre / Vehicle)
Using the Inspections tab, technicians can quickly see all recent inspections, identify those with damage, and apply filters to focus on the most relevant work while TMaSS manages local storage and synchronisation in the background.
Was this article helpful?
That’s Great!
Thank you for your feedback
Sorry! We couldn't be helpful
Thank you for your feedback
Feedback sent
We appreciate your effort and will try to fix the article