The Manage Positions function is the heart of vehicle administration in TMaSS. It's purpose it to provide a single interface for all vehicle-related asset functions such as:
- Removal and addition of rims tyres, adapter plates, TPMS and chains.
- Quick move of rim and tyre assemblies from one position to another making tyre rotations easy
- Updating of treads and pressures
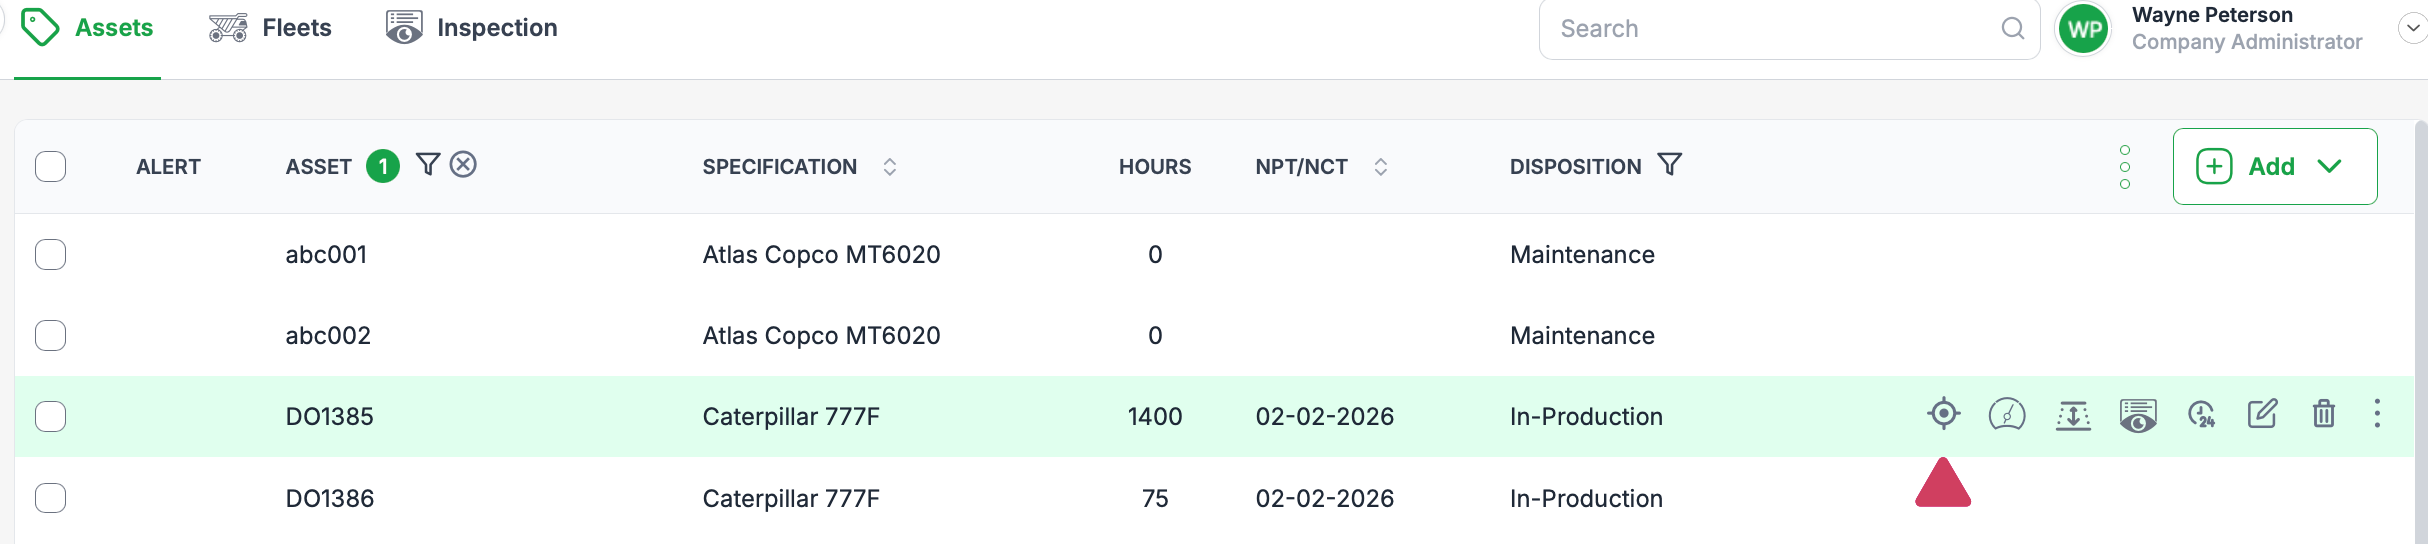
To access the Manage Positions function, find the desired vehicle and from its context menu or details page, click the manage positions icon. 

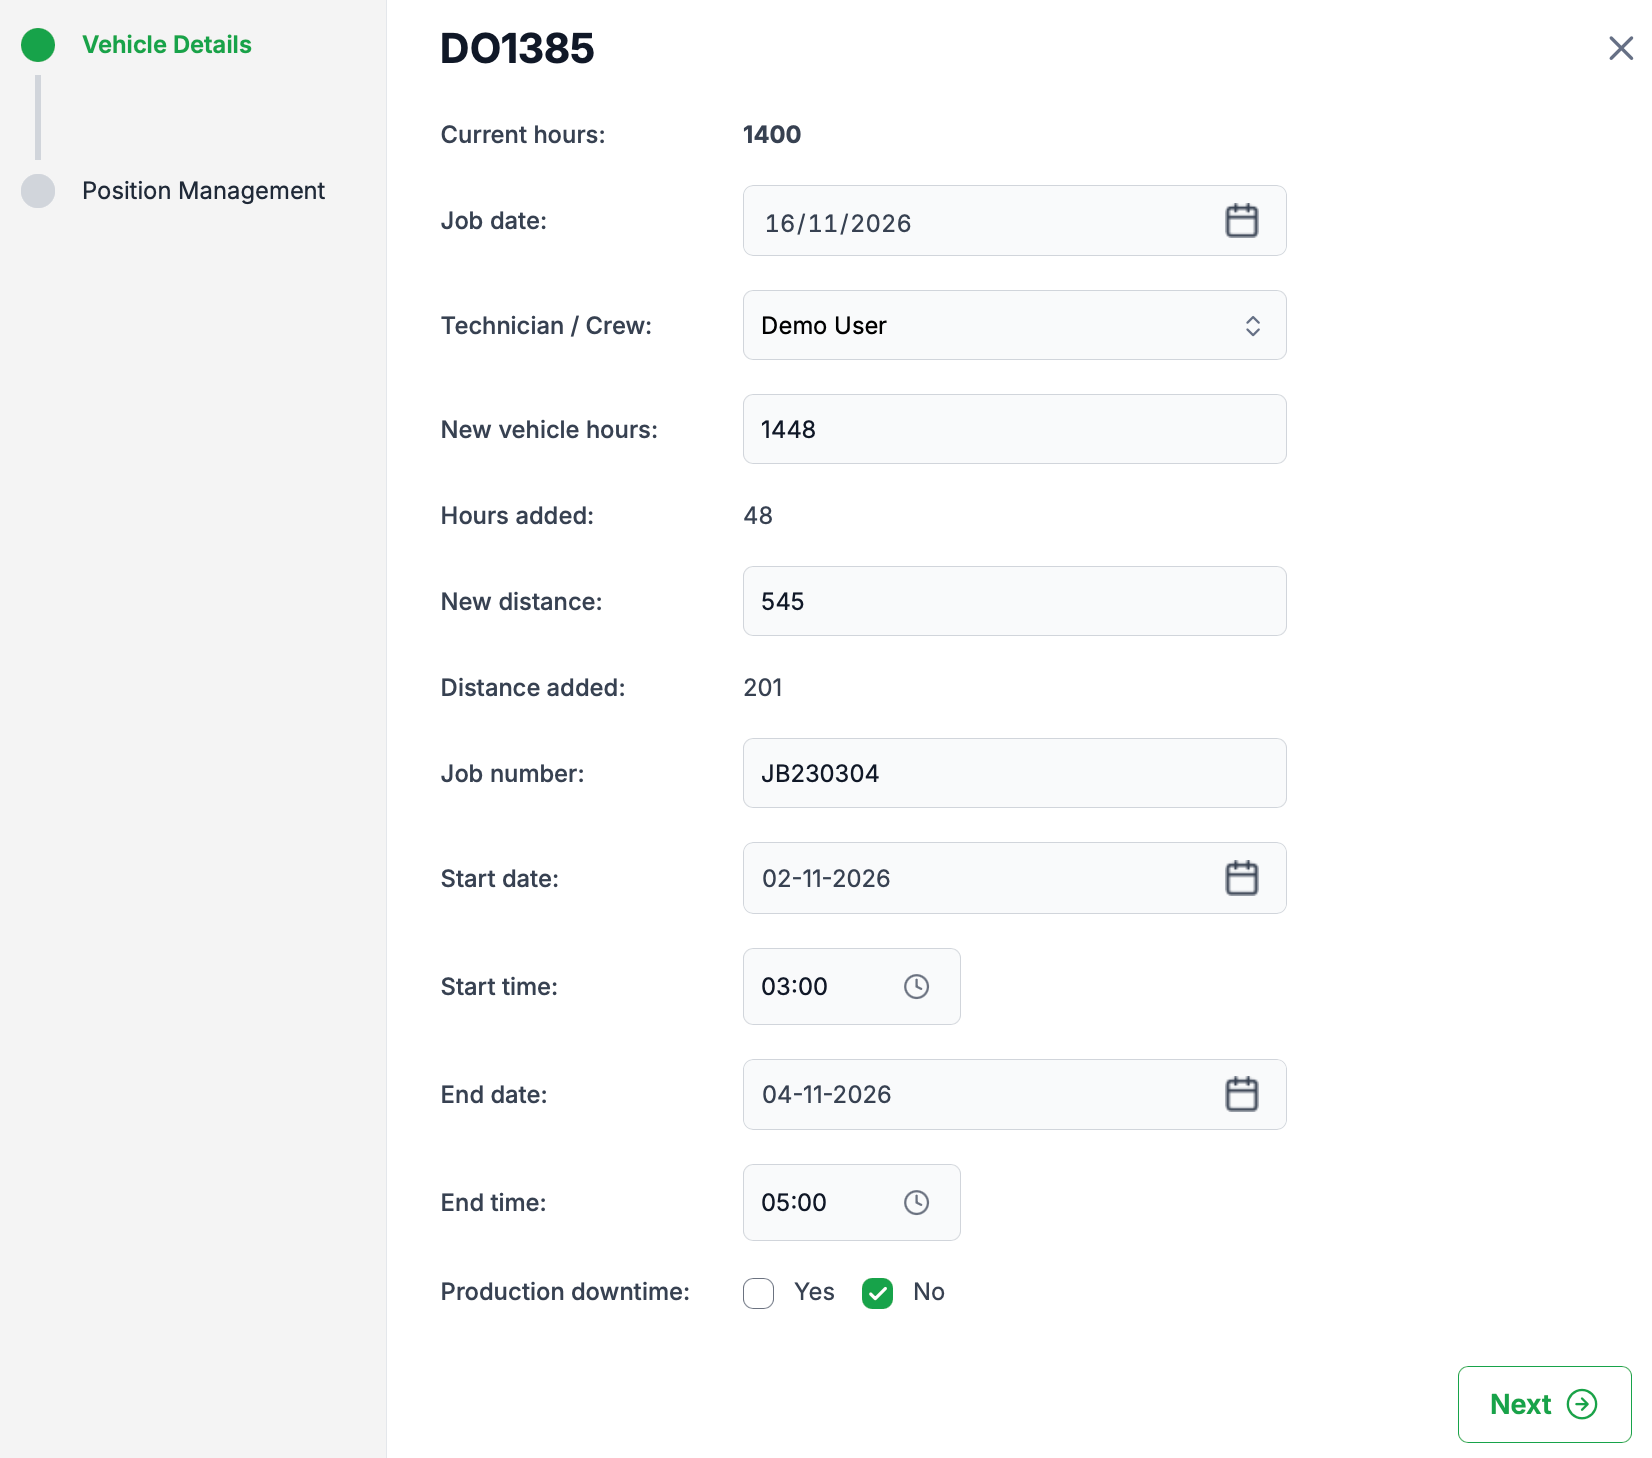
The manage positions dialogue has two sections, a Vehicle Details section, where you add information such as who is doing the job, the vehicle hours & distance travelled, job number, start and finish time and date and weather the task was production downtime, and Position Management. Position management is where the magic happens.
Section 1: Vehicle Details
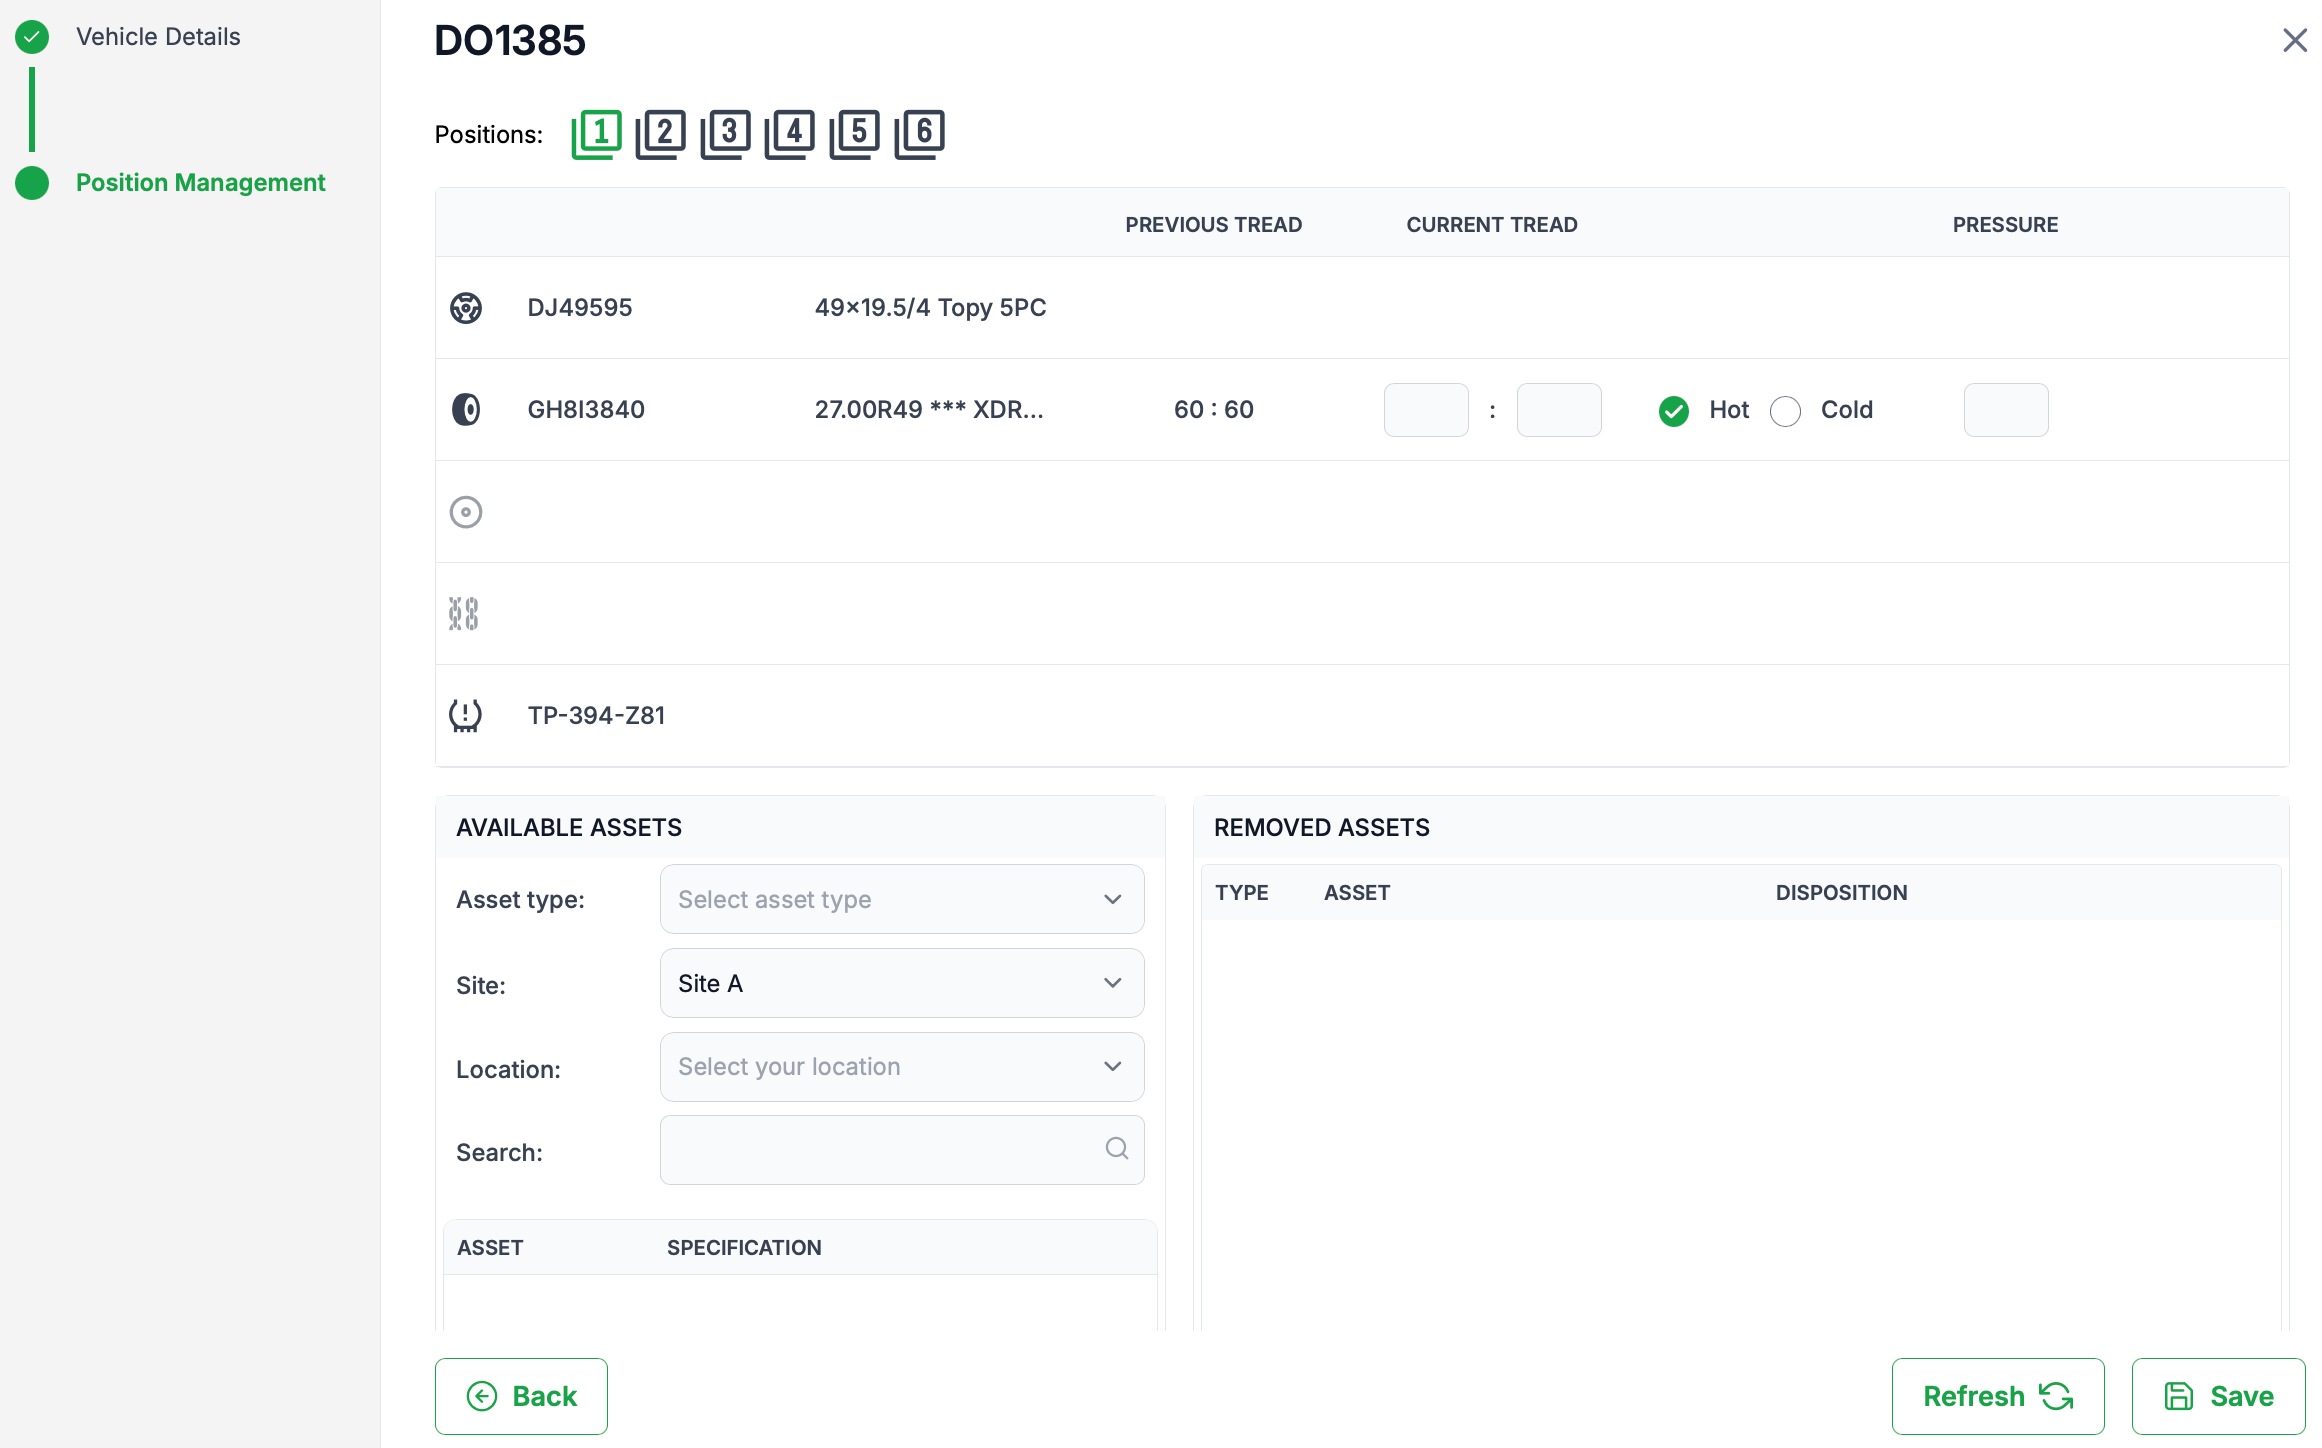
Section 2: Position Management
Finding your way around
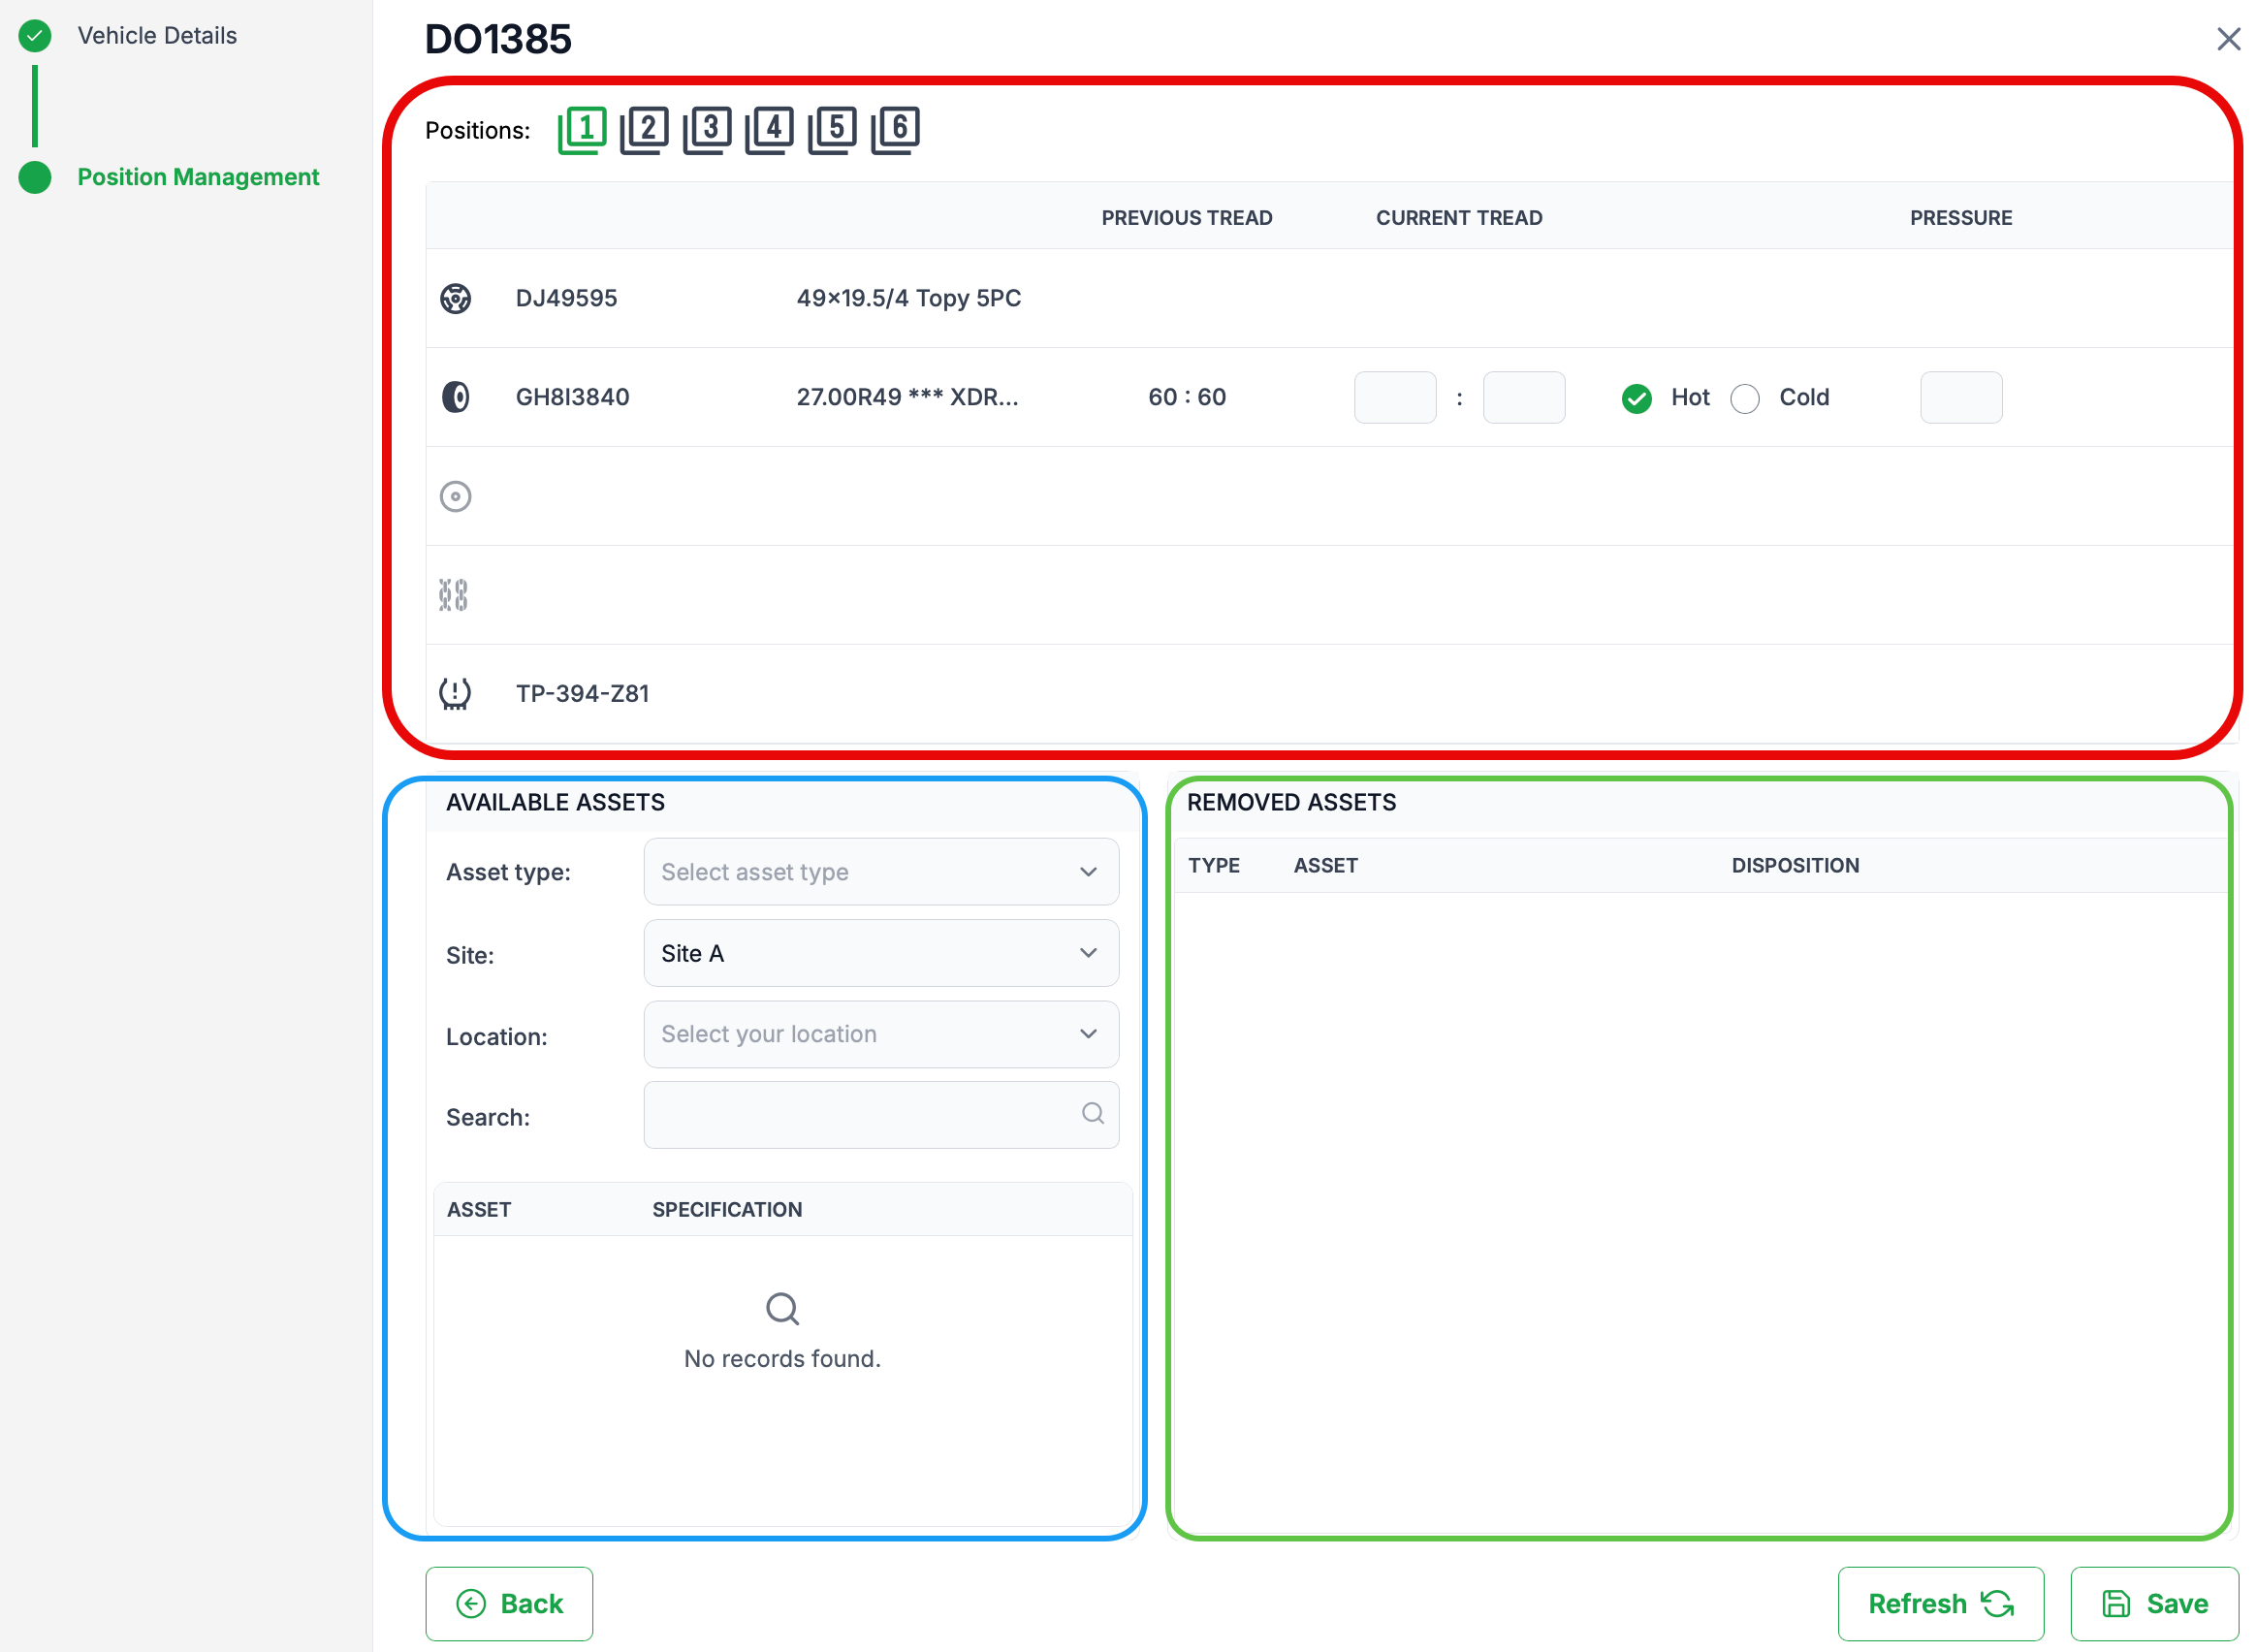
The position management dialogue is segmented into 3 sections.
- The Positions - Each position is numbered and its corresponding assets displayed
- Assets available- Assets displayed here relate to the asset type selected above.
- Removed assets - Any assets removed will be displayed here.
ALERT: Assets such as vehicles, rims, chains and adapter plates have approved fitments. When creating these asset types it is recommended that approved fitments are added. If not, then they will not be available in the "Available Assets" as this section is filtered to only show assets that are specified to fit.To move between positions, select the desired position by clicking on the position number shown at the top of the dialogue.
Removing Assets
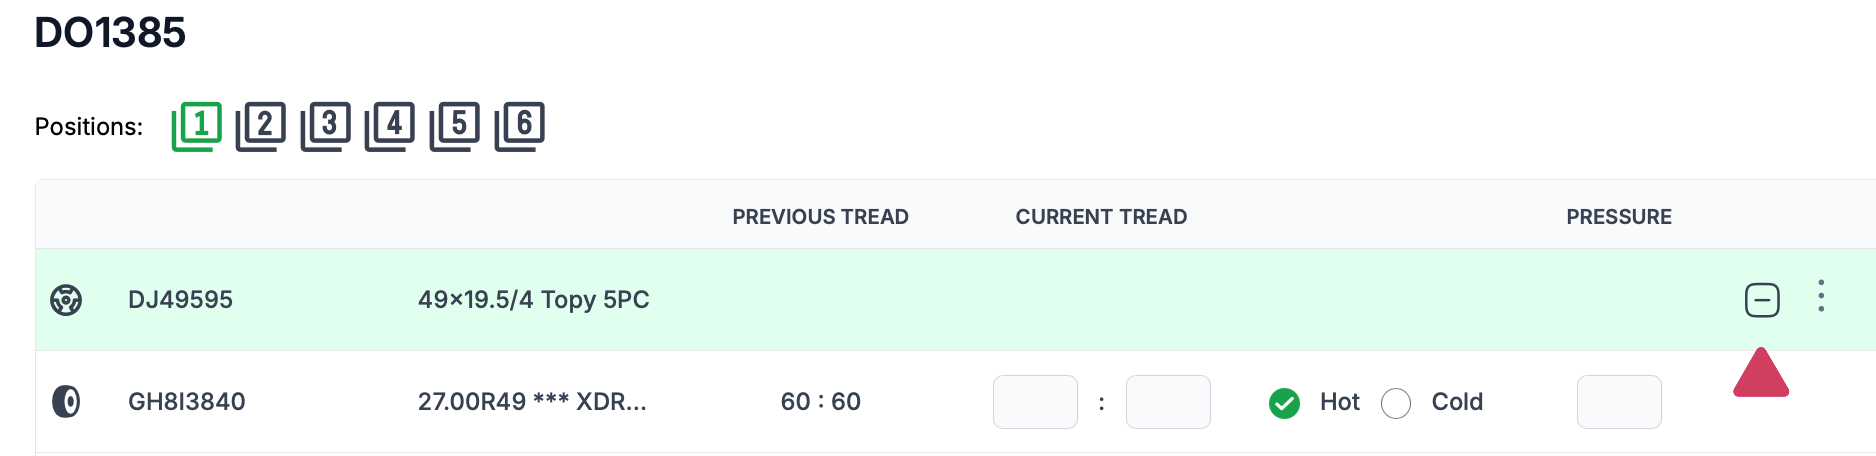
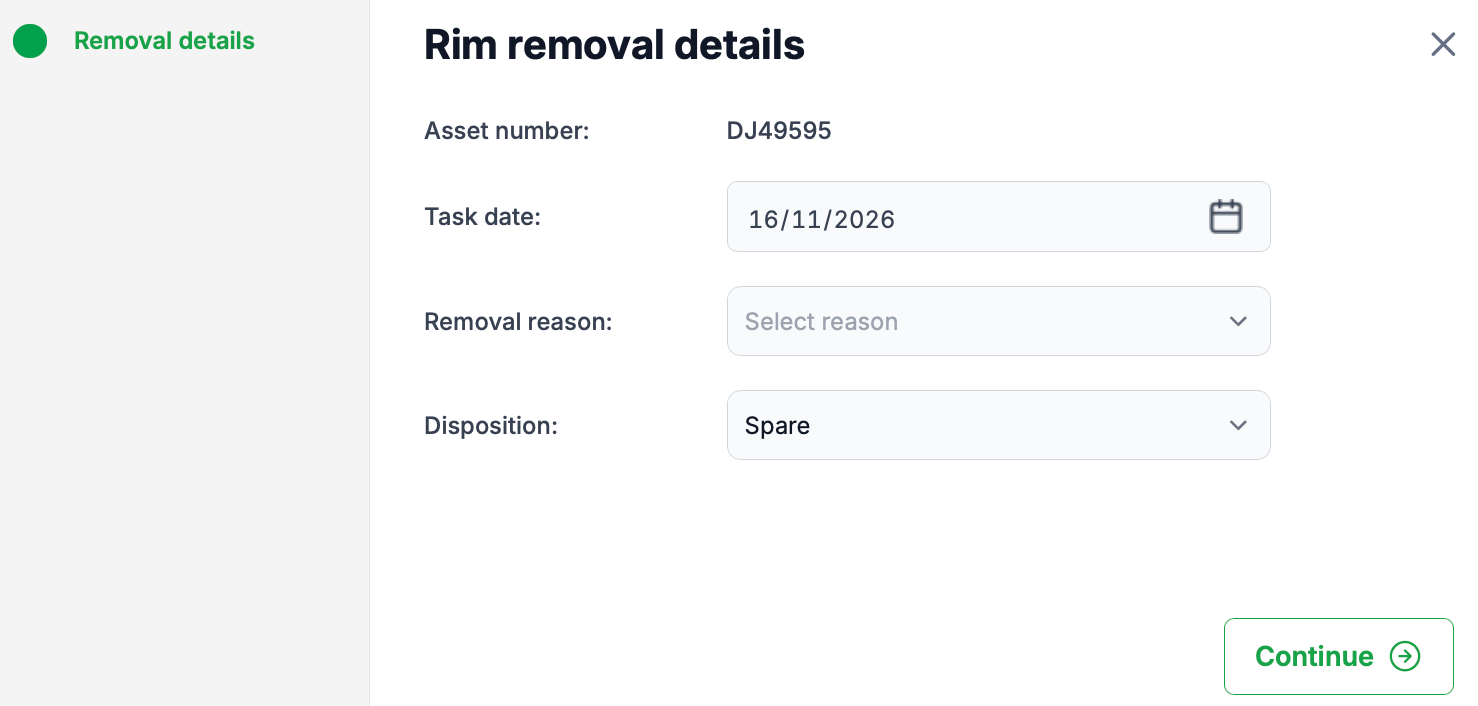
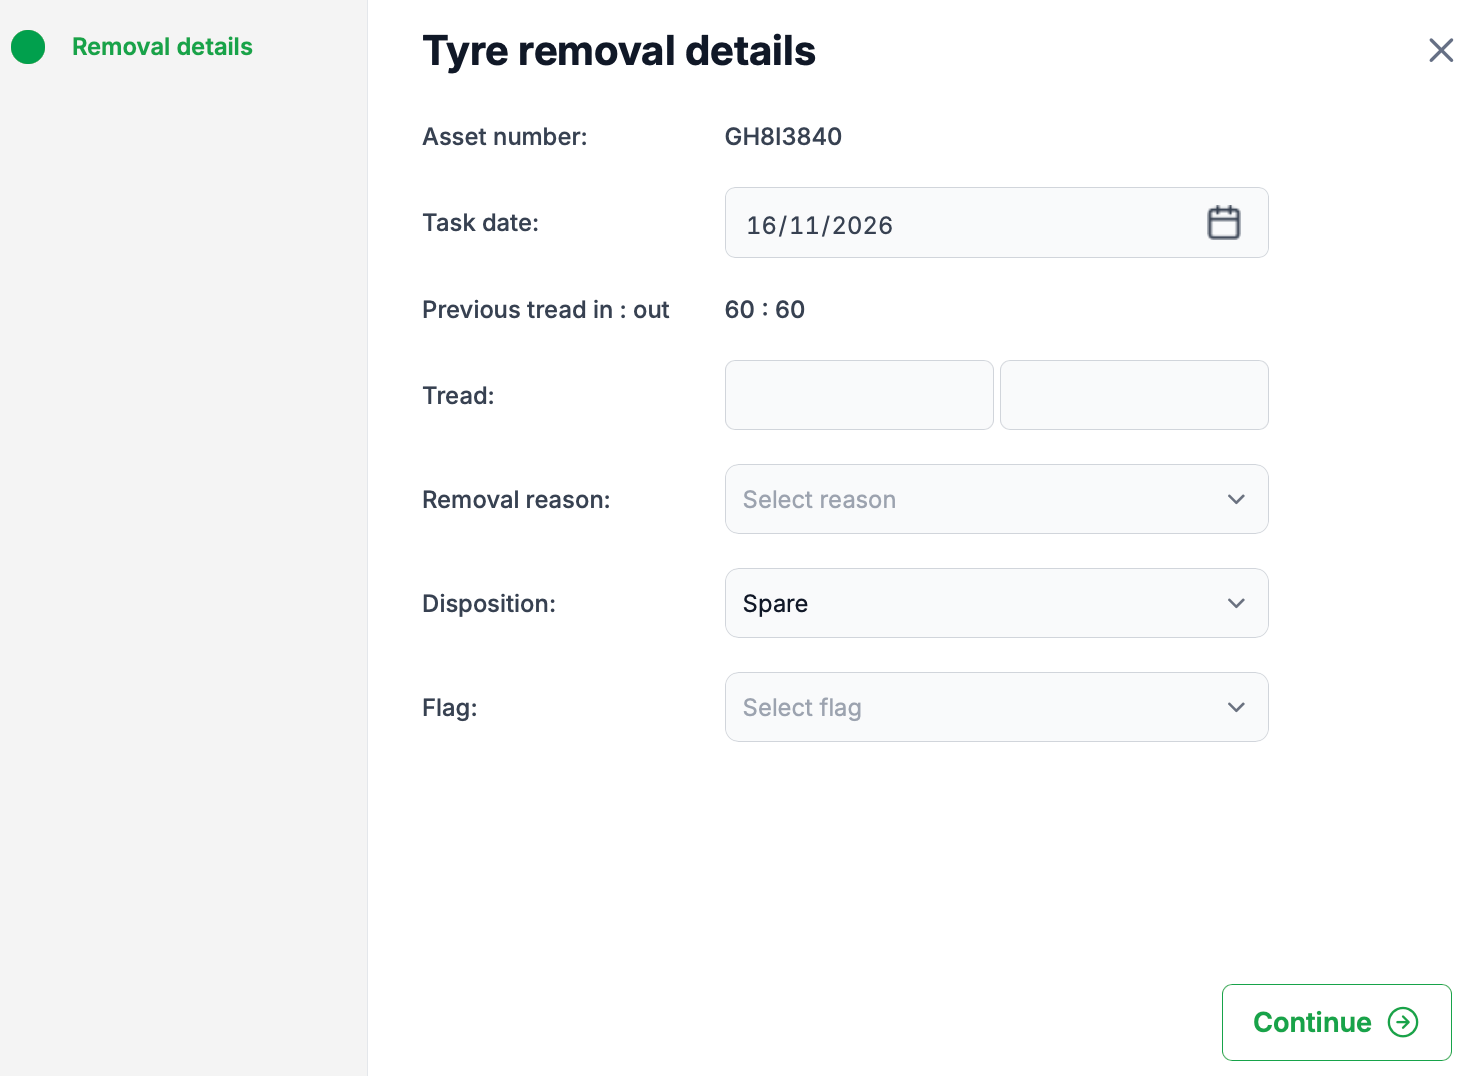
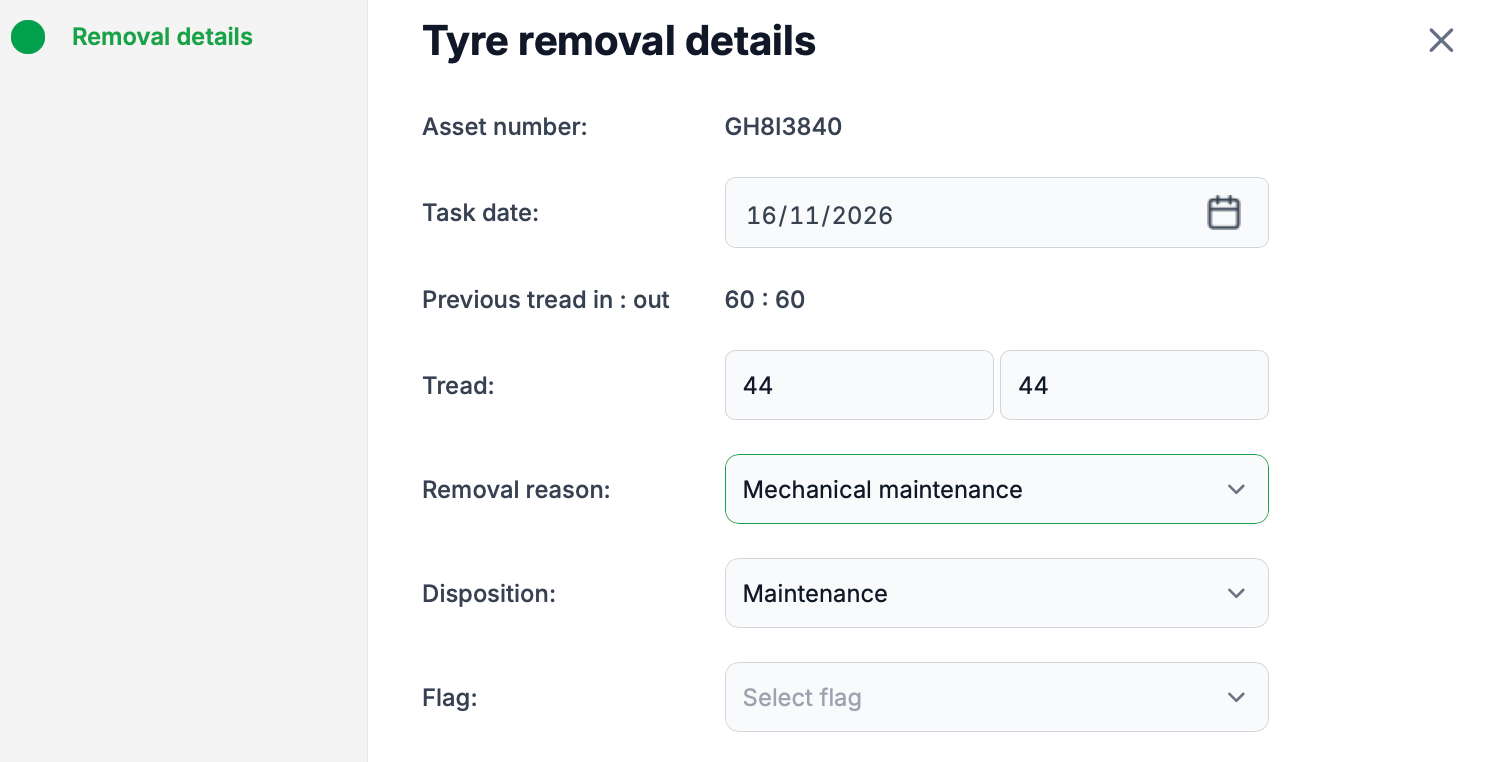
Removing assets is as simple as clicking the remove or minus icon. Once you remove an asset, a removal details dialogue will be displayed asking for its removal information. Rims, adapter plates and chains all request the same information such as date, removal reason and the required disposition after removal. While a tyre removal adds tread depths (is mandatory) and provides the ability to add a flag.
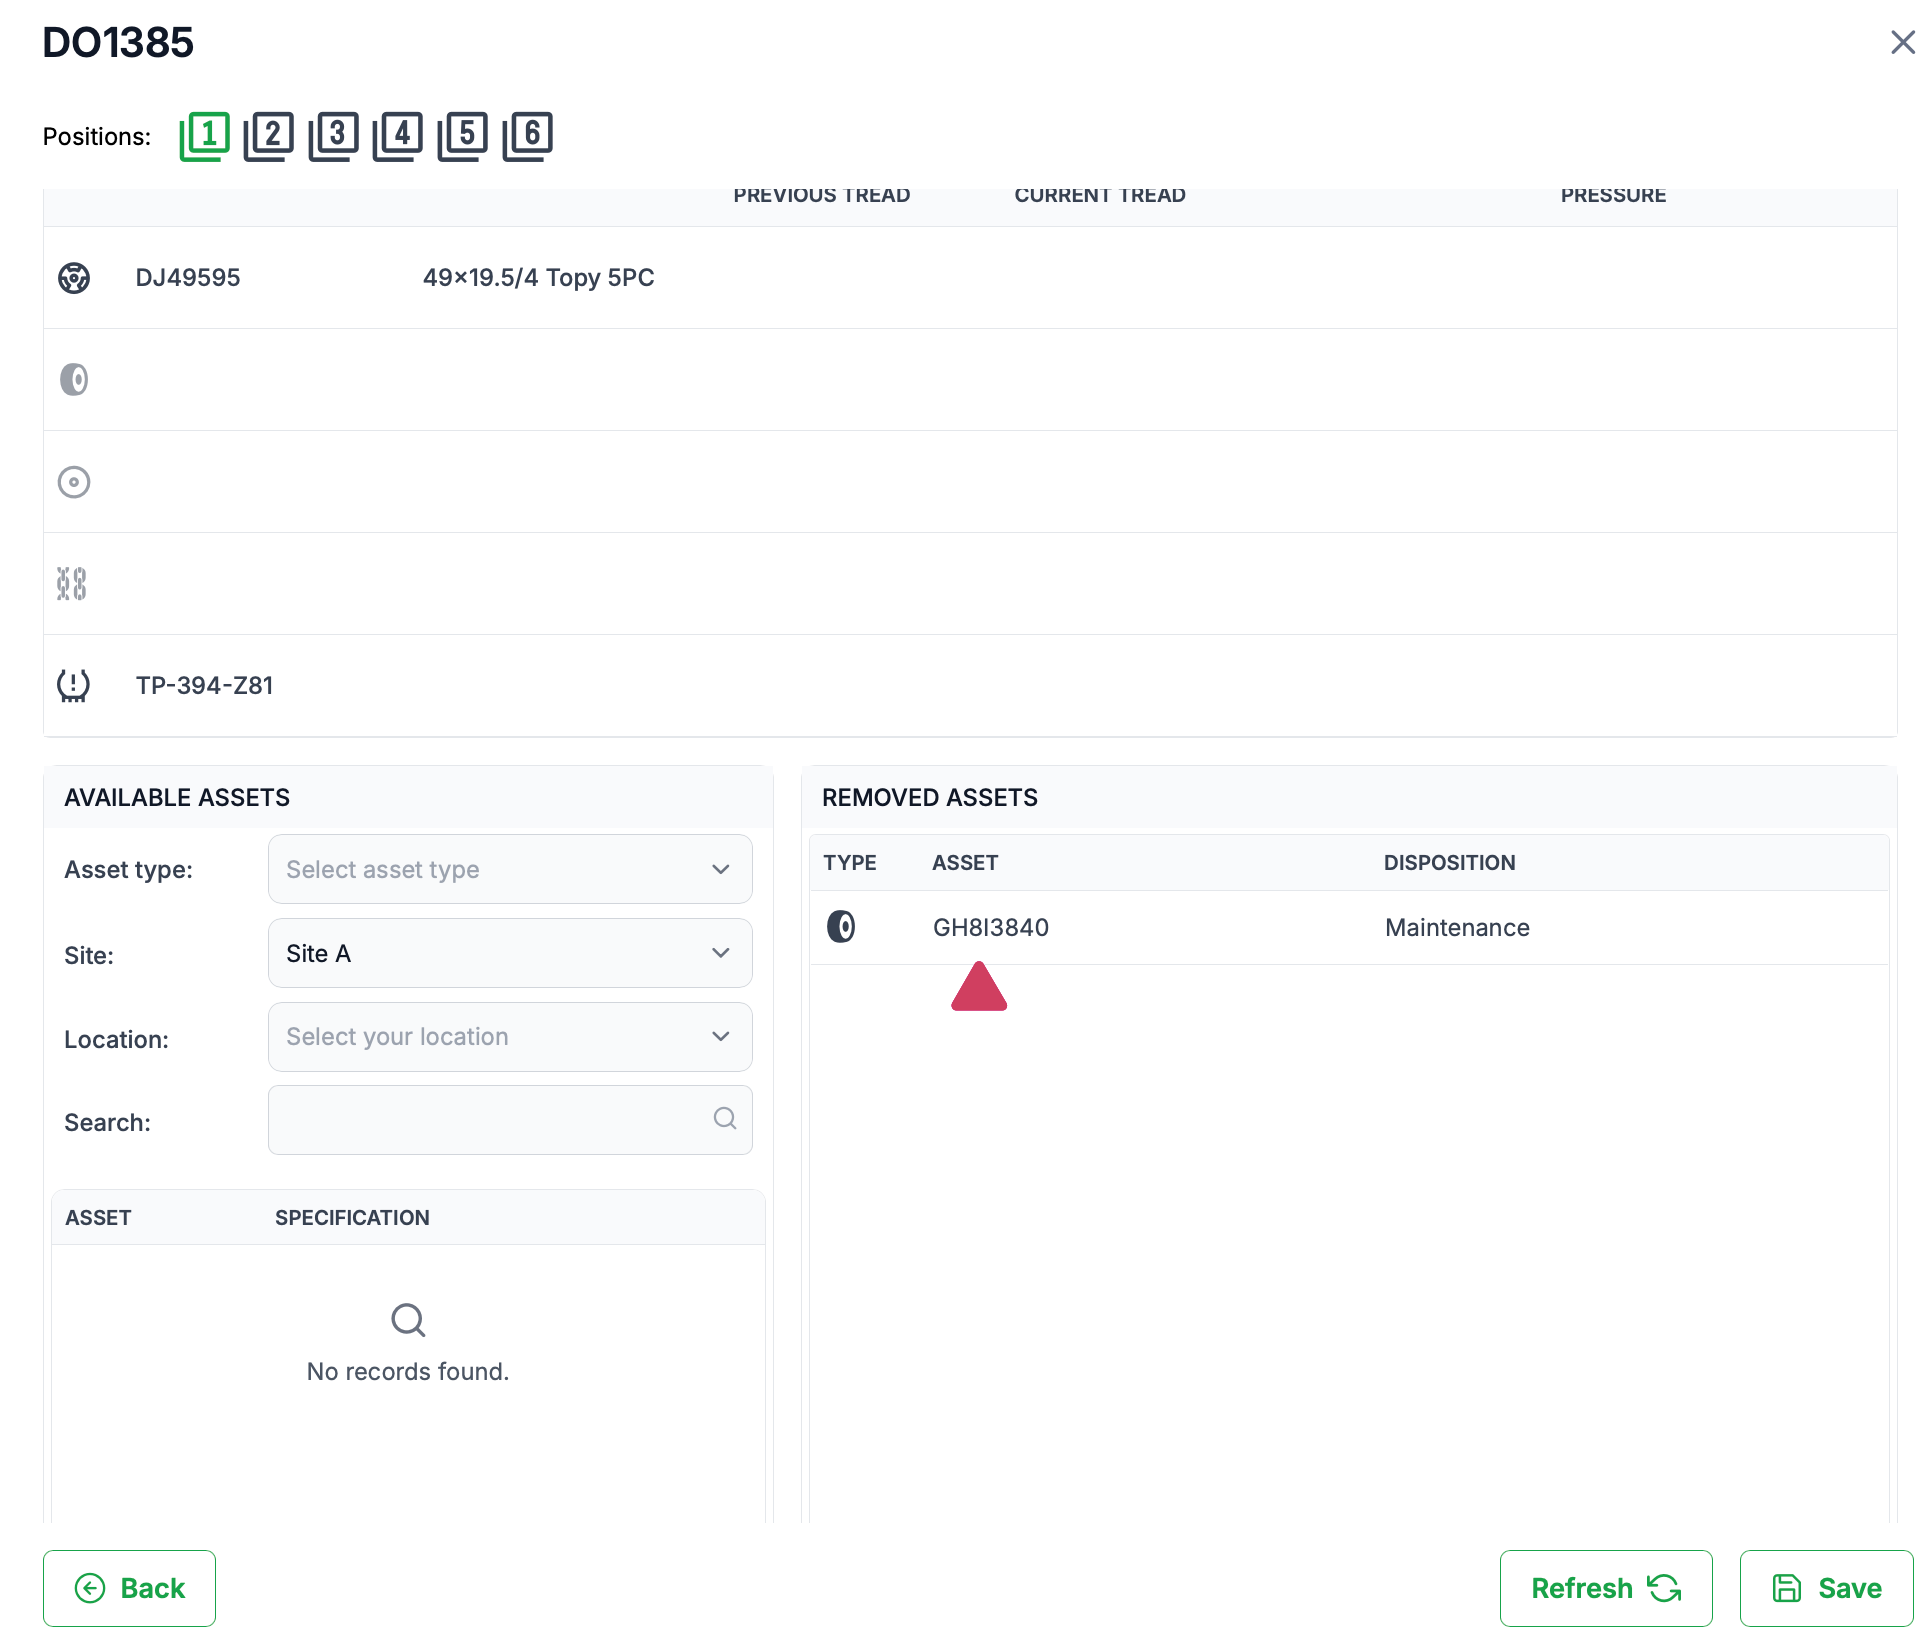
Once an asset is removed it is placed in the "Removed Assets" section.
If you remove an asset by mistake, you can always press refresh. Pressing refresh will revert the vehicle back to its initial state.
Changing asset dispositions on removal
When removing assets setting the correct disposition is vital for asset management and data accuracy. Therefore, when removing assets it is recommended that a disposition is selected that closely represents the state of the asset removed.
Alert: If the current list of available dispositions doesn't have the required state, you can add new dispositions in the Company module. Note that you will require the Administer role to modify system settings.
For example, if a tyre is being removed as it is damaged, determine if it will be repaired, and if so, set its disposition to "Repair". This way, future reporting will be accurate and you will have a clear understanding of your assets state.
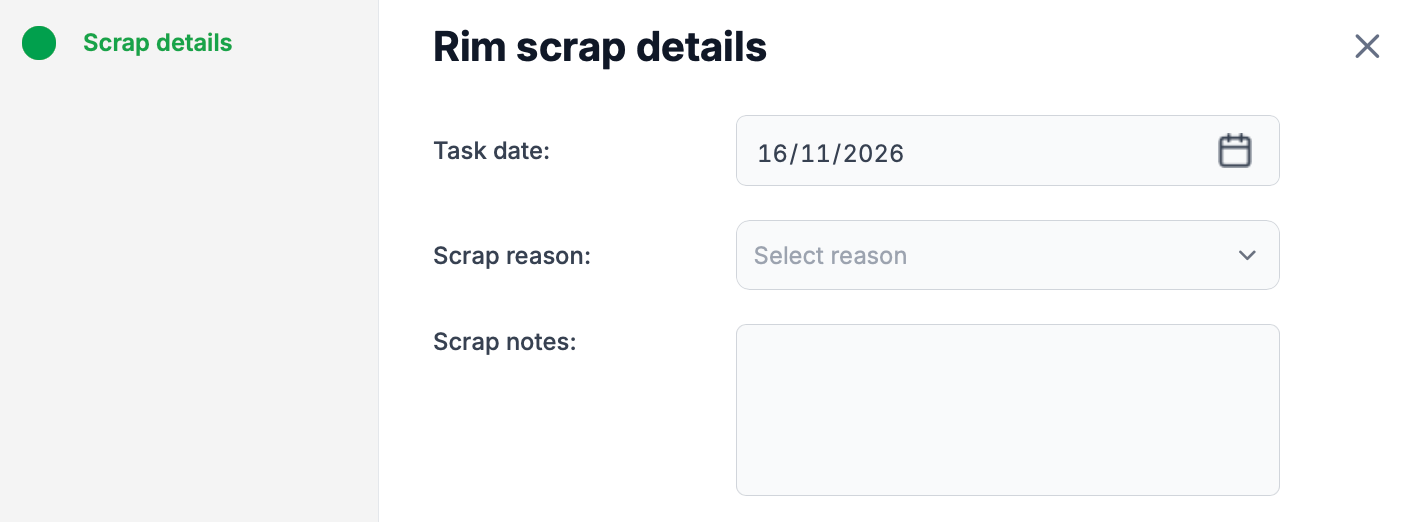
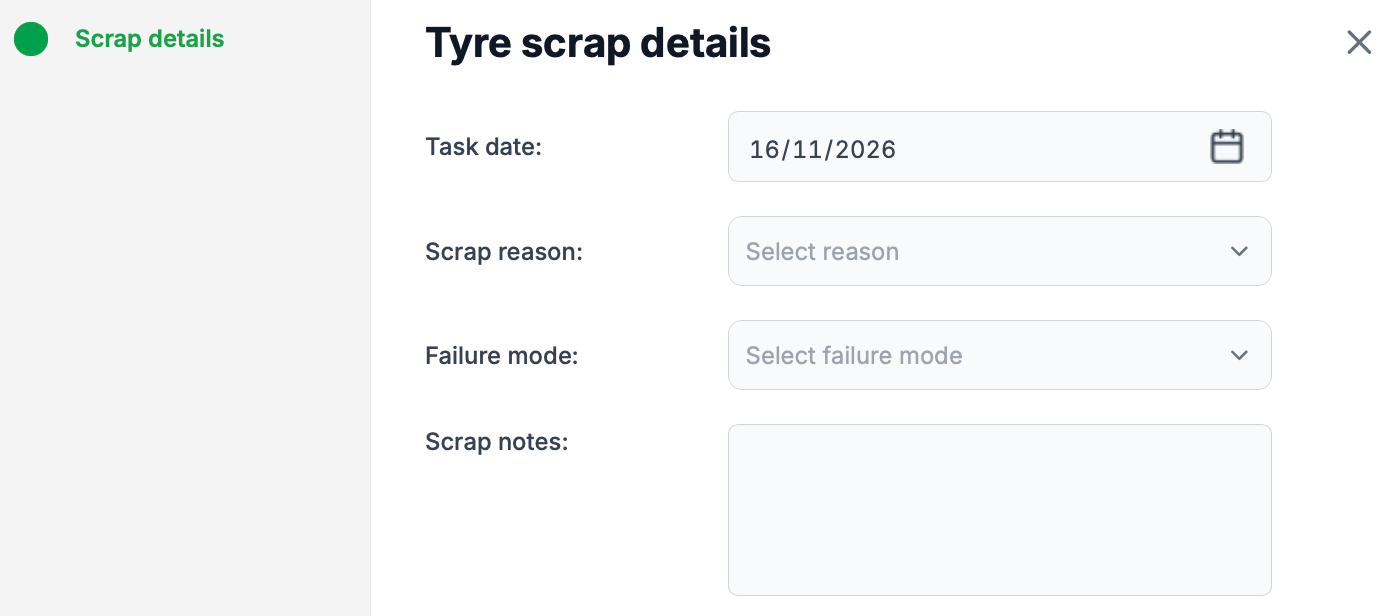
When removing a tyre or a rim add setting its disposition to 'Scrap" additional information such as scrap reason and or failure mode is required. Again this is important information as it will make reports such as scrap average and failure modes accurate thereby making asset management clear and concise.
Removing and replacing a tyre
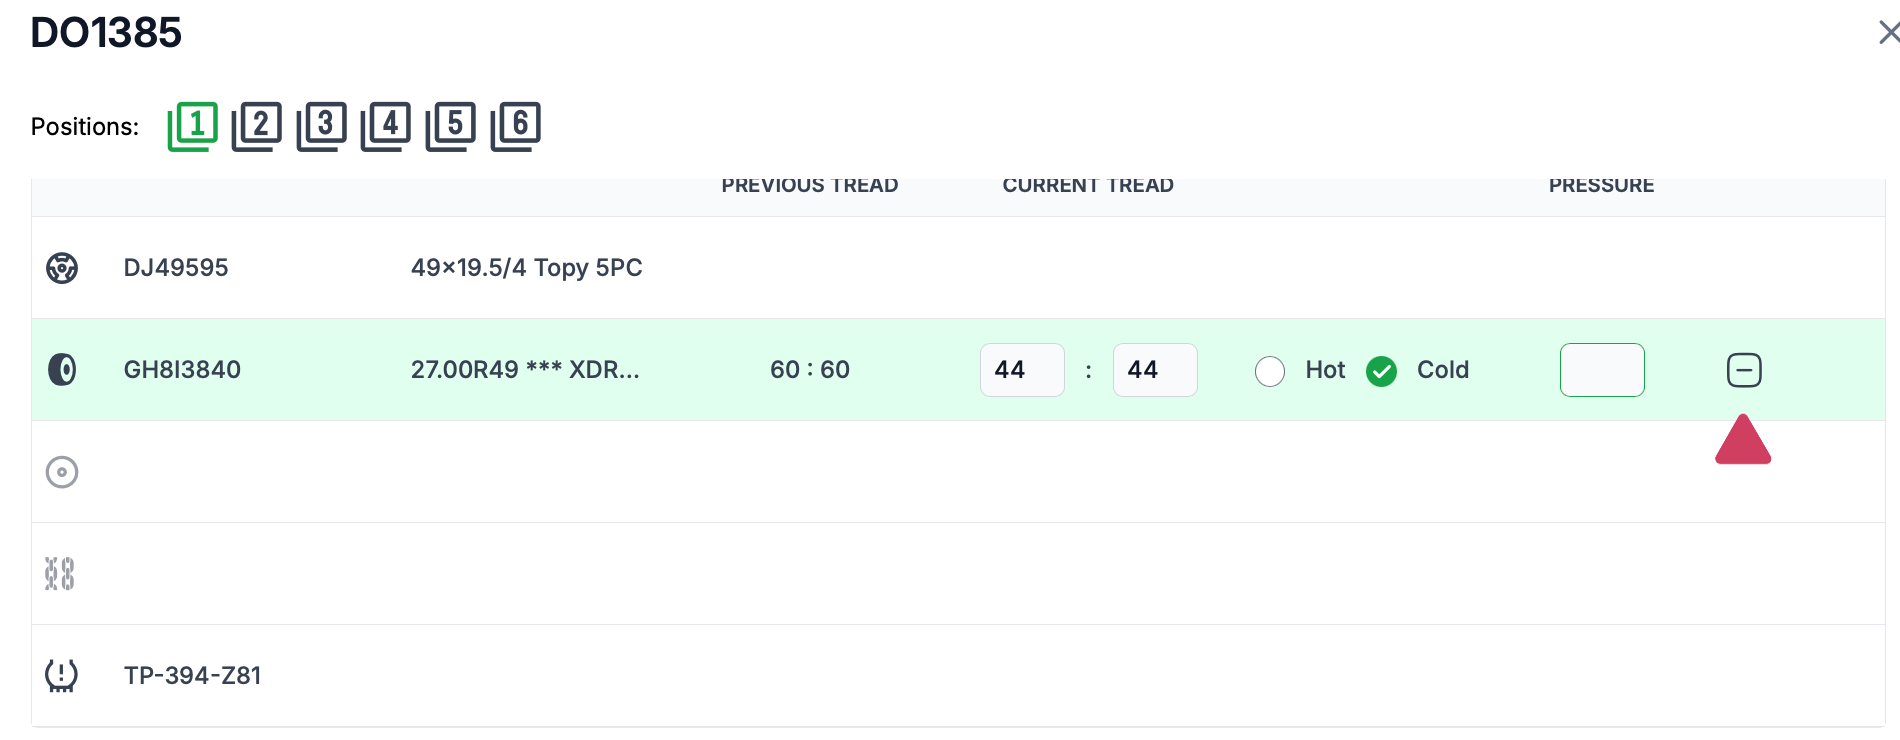
To remove a tyre, select the tyre enter its current tread (as this is mandatory) and click the remove icon.
Note that the process to remove other asset types remains the same.
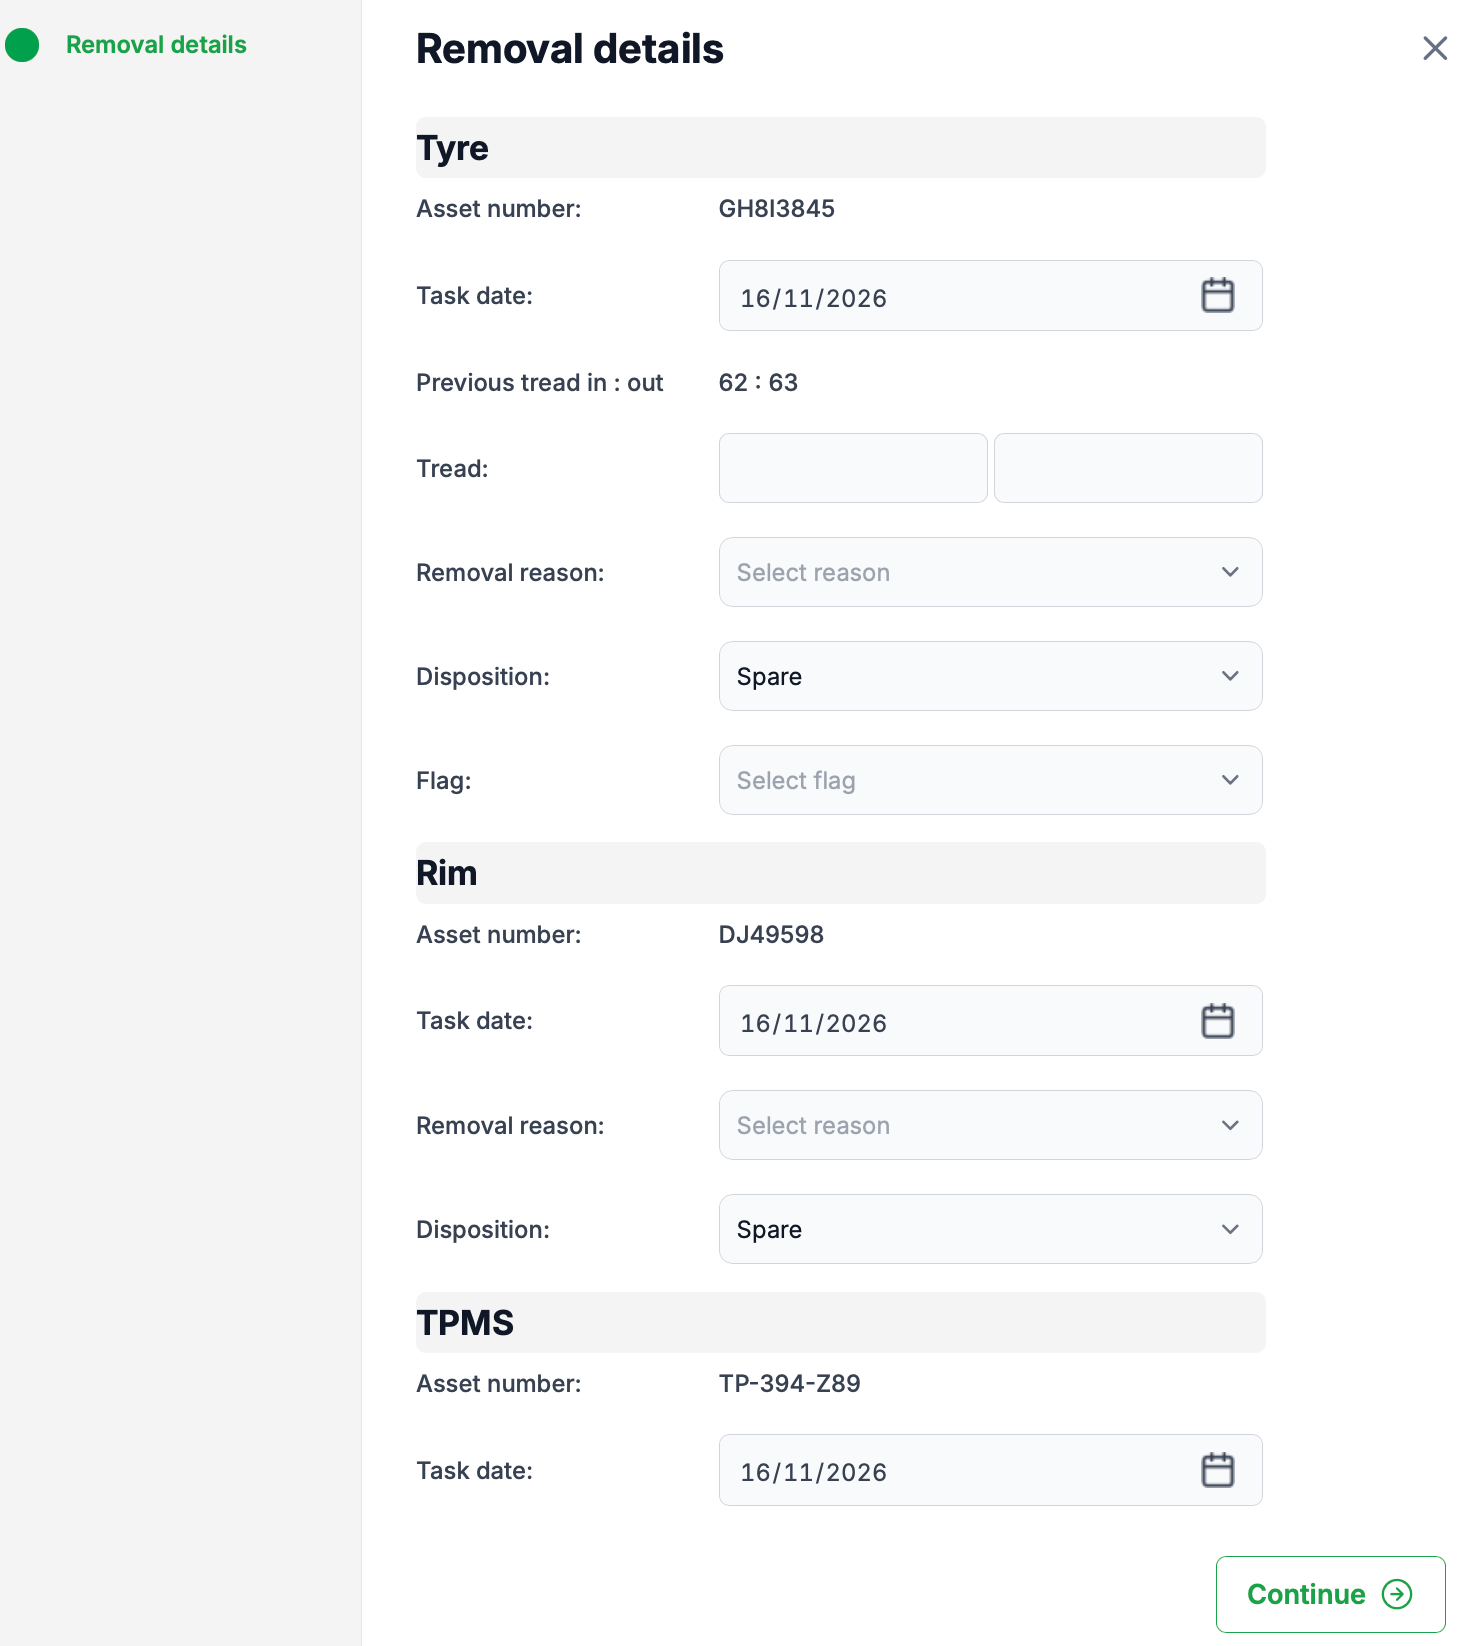
The removal details will be displayed. Enter the tread depth (these will be carried forward if entered previously) the removal reason and disposition. Then press continue.
The asset will then be moved to the 'Removed assets" section
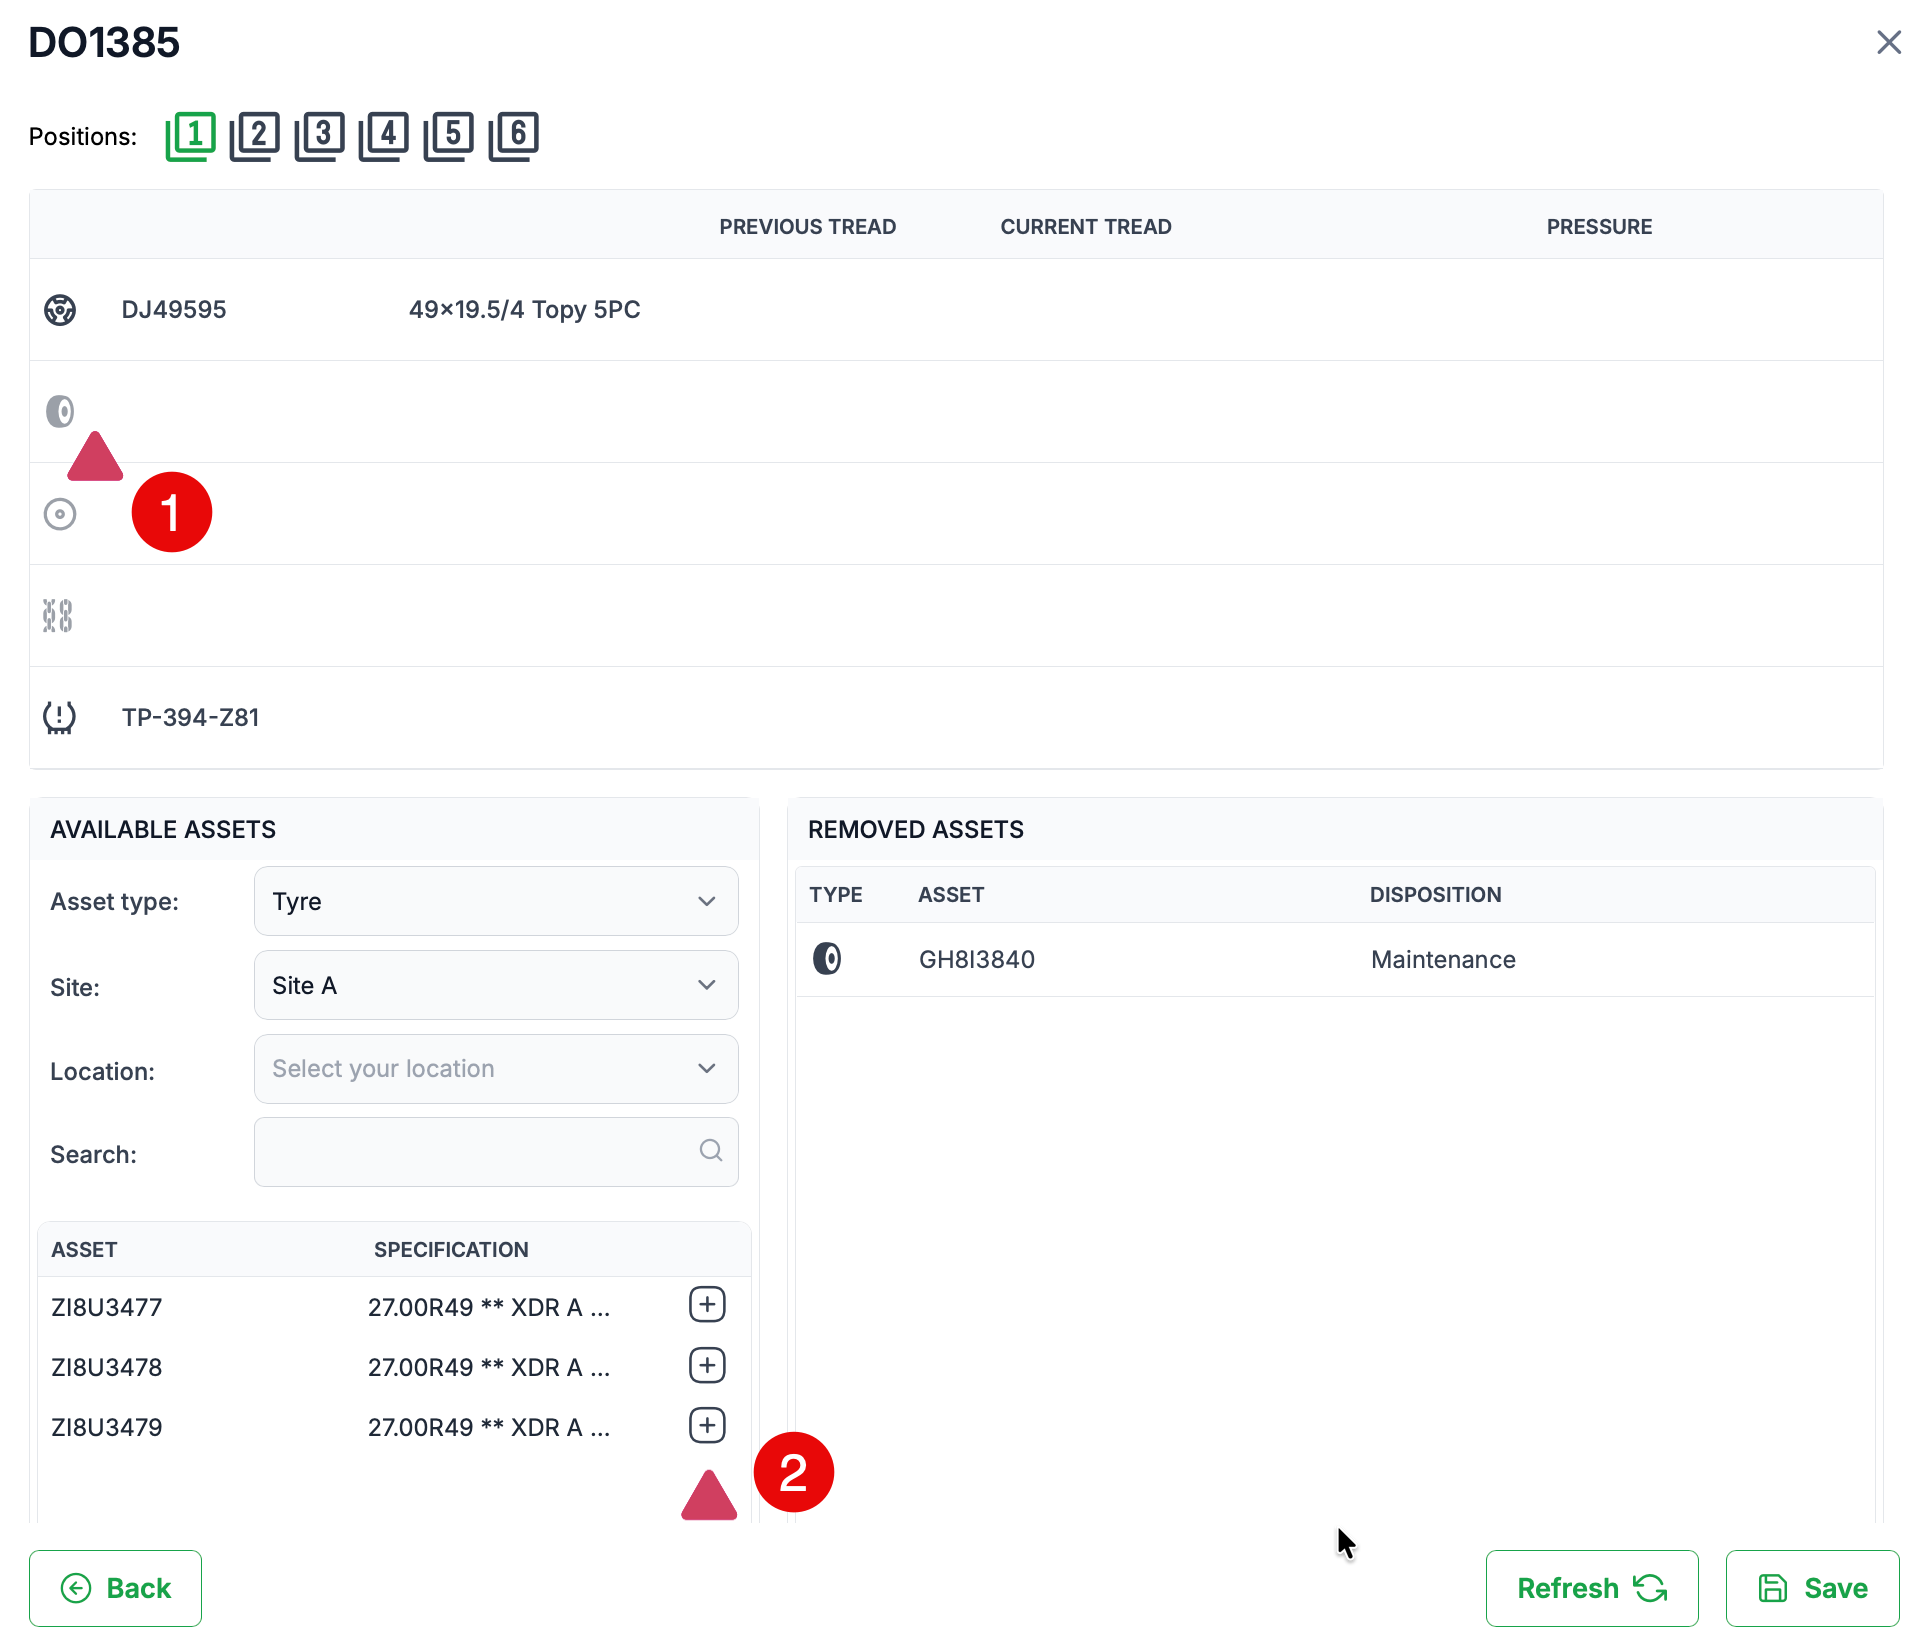
To replace a tyre first select the vacant tyre position (1) a list of available assets will be displayed and then press the 'Add' icon to add it.
Alert: By default the available assets shown from the currently selected site. If the required tyre is at another site, change the site filter to the desired site.
Moving an assembly
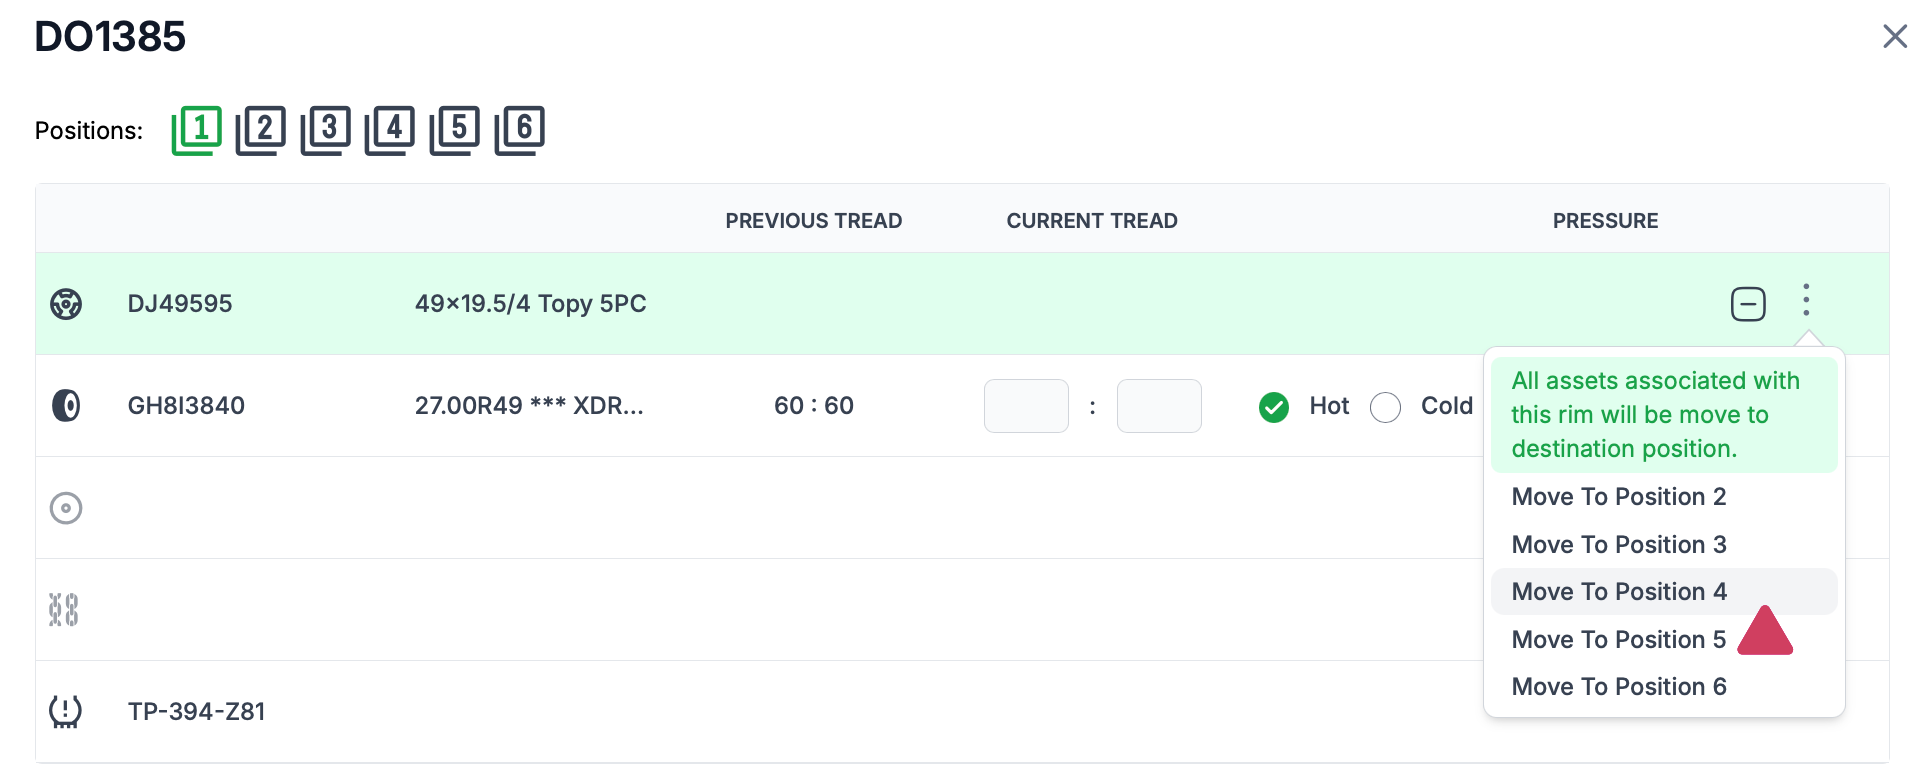
You can move a whole assembly from position X to position Y by selecting the rim and clicking the 3 dots. A dropdown menu will be displayed showing the available positions. Click on the desired position and both the rim and tyre will be moved to that position. Any existing asset at that position will be moved to the 'Removed assets' section after you provide the removal details for those assets as shown below.
In this example, Position 1 is being rotated to Position 4. You will notice that 3 assets were removed, a tyre, rim and TPMS.
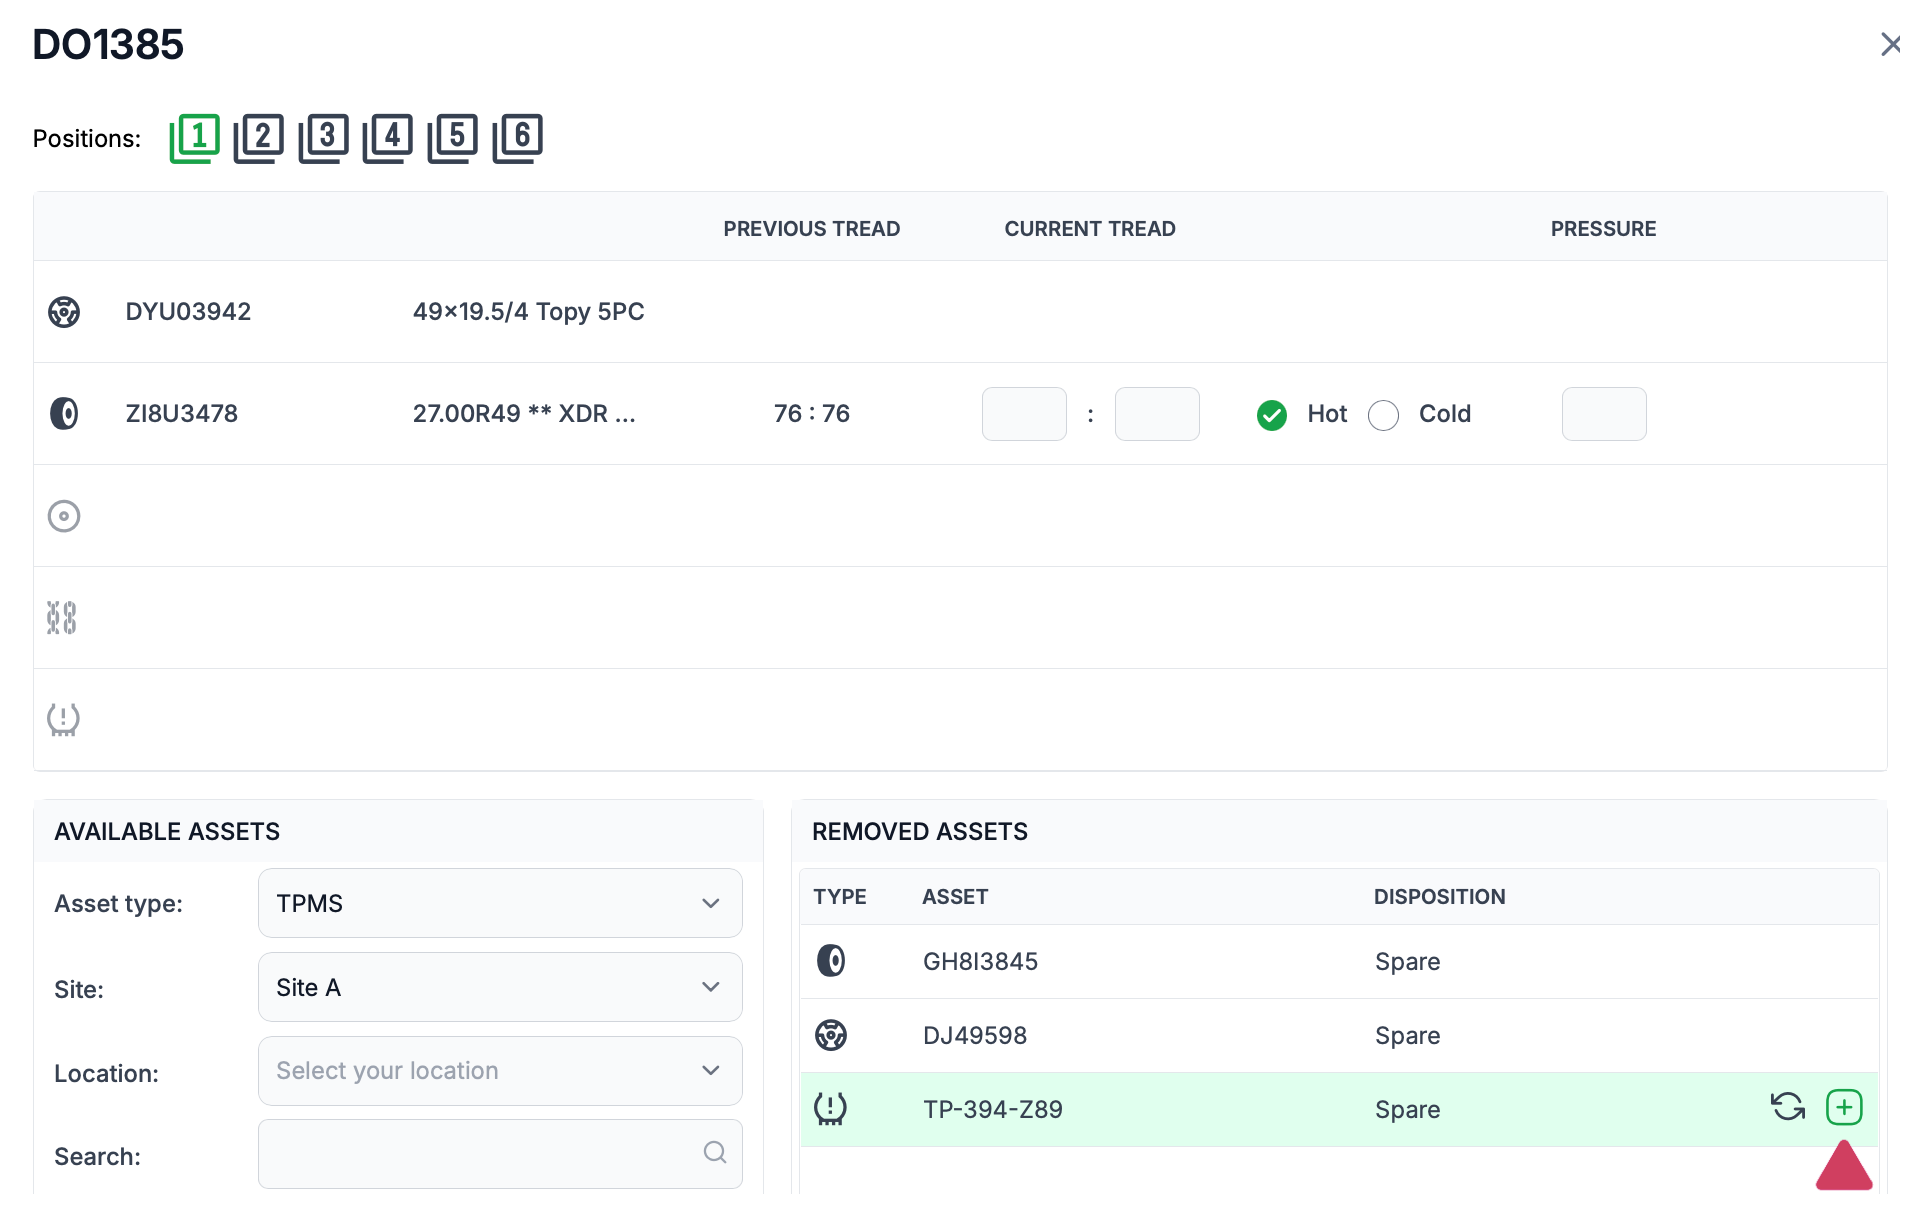
The image below shows the assets that were removed, and that new tyre and rim assets added to Position 1. However, the TPMS that was removed from Position 4 needs to be added to Position 1. This can be easily achieved by clicking the 'Add' button when having the desired position selected.
Once all the required asset movements have been completed for the vehicle press save to complete and save your edits and exit the Manage Positions dialogue.
Was this article helpful?
That’s Great!
Thank you for your feedback
Sorry! We couldn't be helpful
Thank you for your feedback
Feedback sent
We appreciate your effort and will try to fix the article